Connected Commerce Setup Guide for Retailer


Prerequisites
Before you begin, ensure that your Business Portal account and Firework Store are set up.
1. Sign in to your Business Portal account
Log in to your Business Portal account. If you haven't created one yet, refer to Setup Your Firework Business Portal Account.
2. Set up your Firework Store
Add your products to your Firework Store by following the instructions in Set Up Your Firework Store.
3. Sync products from the Brand account
Once both the Brand and Retail stores have been configured, Firework automatically syncs all eligible Connected Commerce products from the Brand account to the Retail account. No additional action is required during this step.
4. Embed and verify product videos
4.1 Embed videos on your product pages
Embed your videos on the Product Detail Page (PDP) by following the instructions in Embedding Videos Within the Product Detail Page.
4.2 Verify synced videos
Check all videos
- In the Business Portal, navigate to Video > Library > All Videos
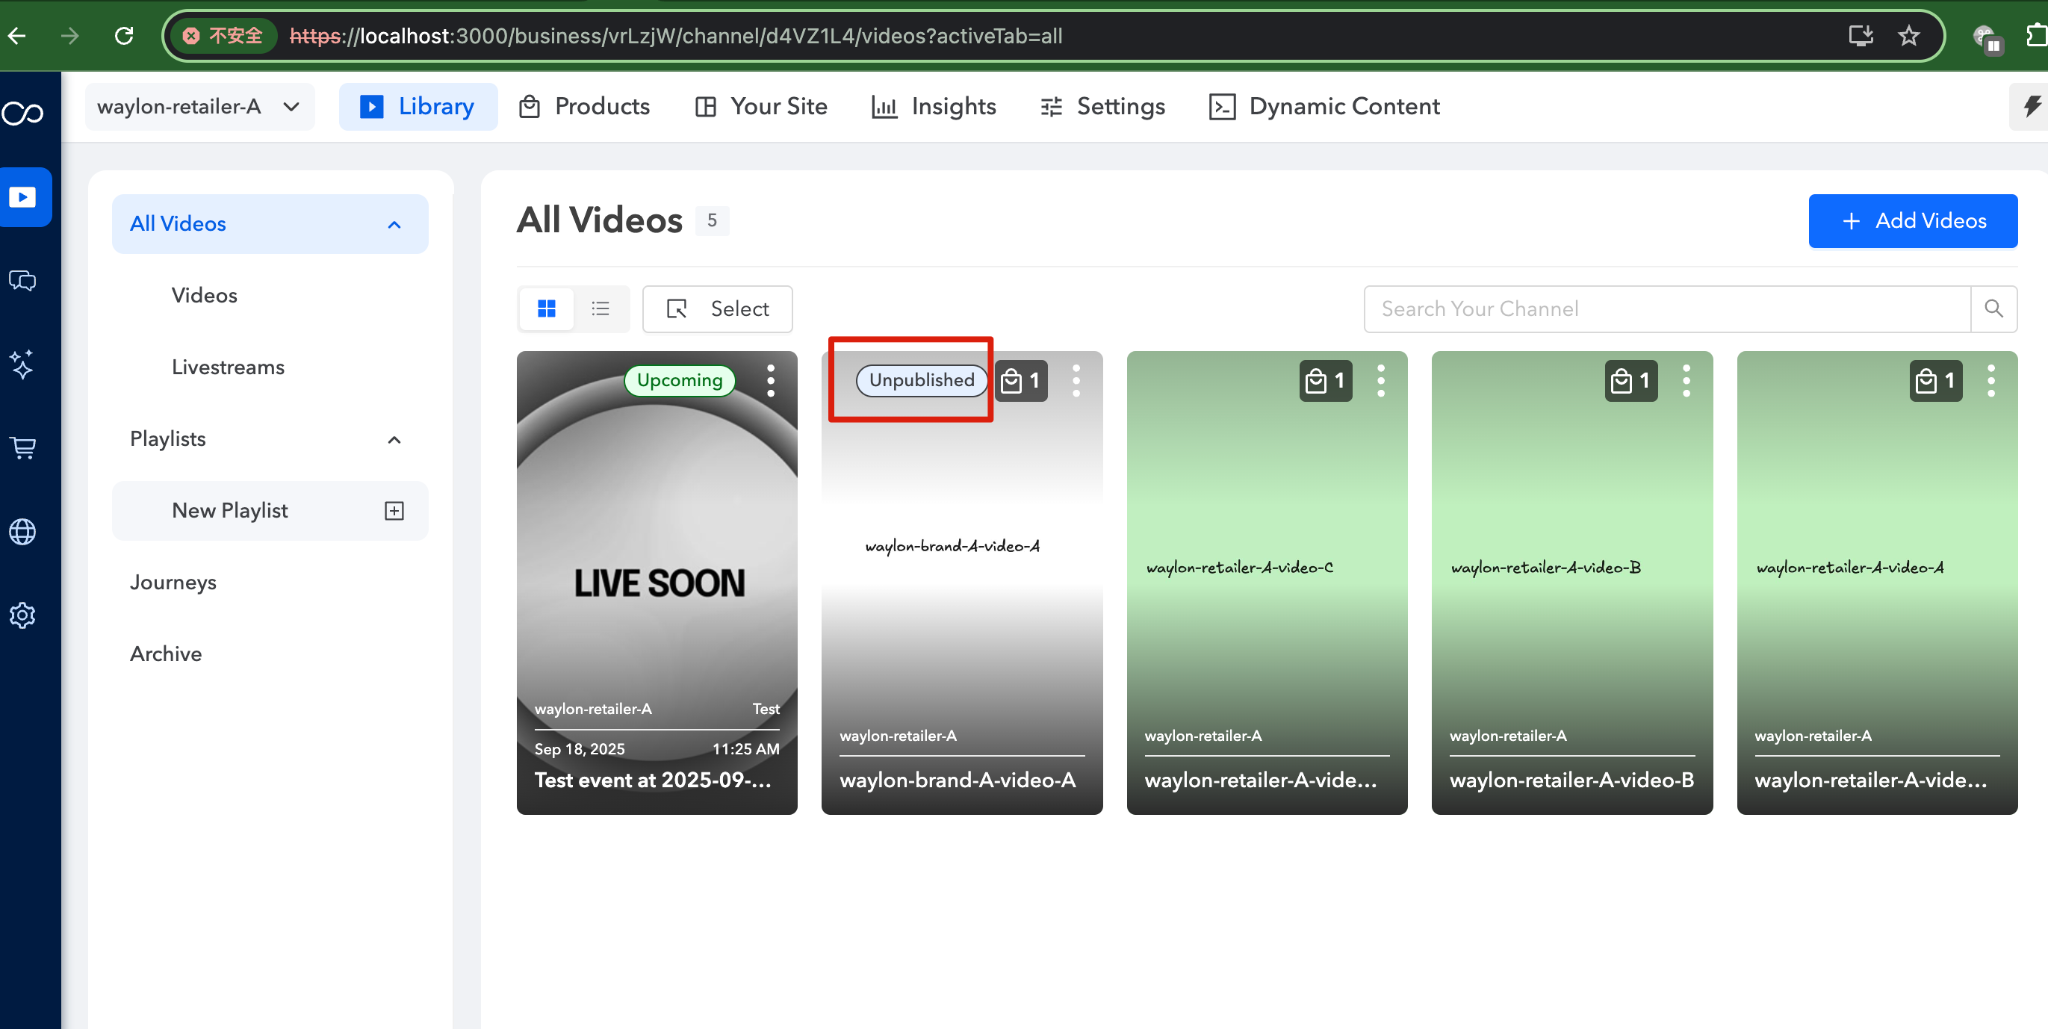
- Use the Video Source filter to view synced videos.
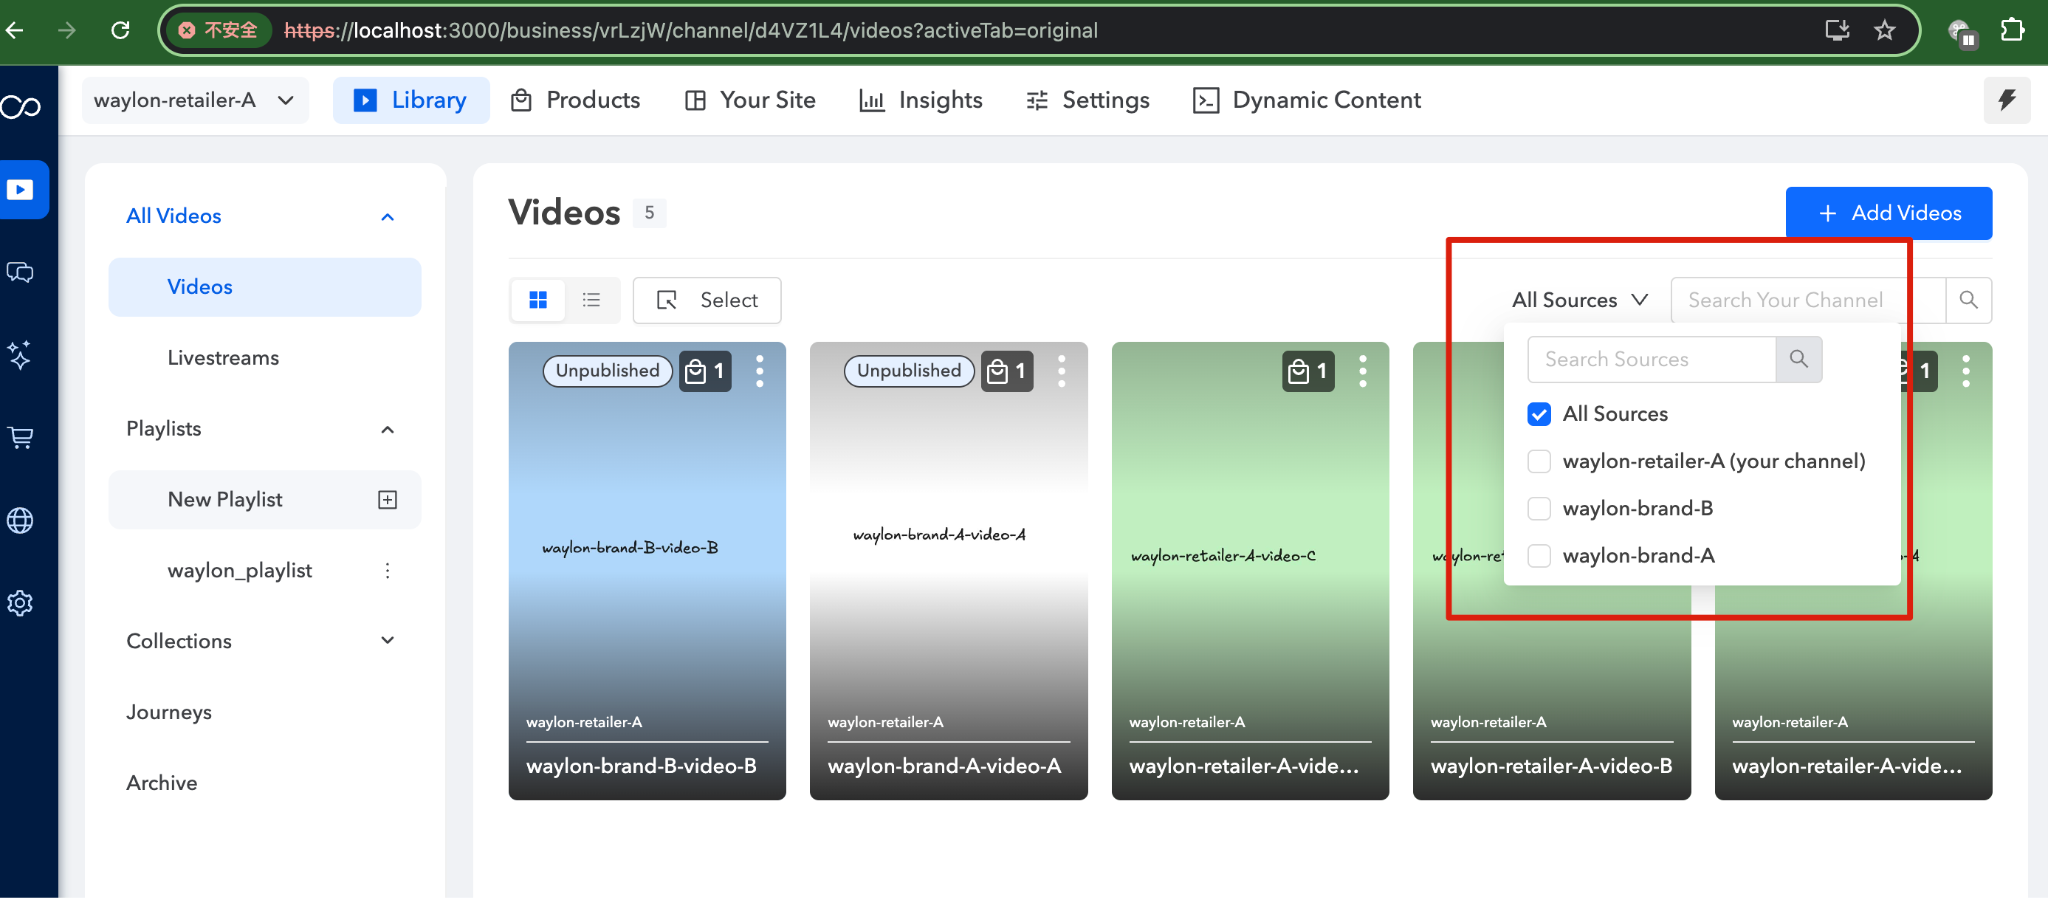
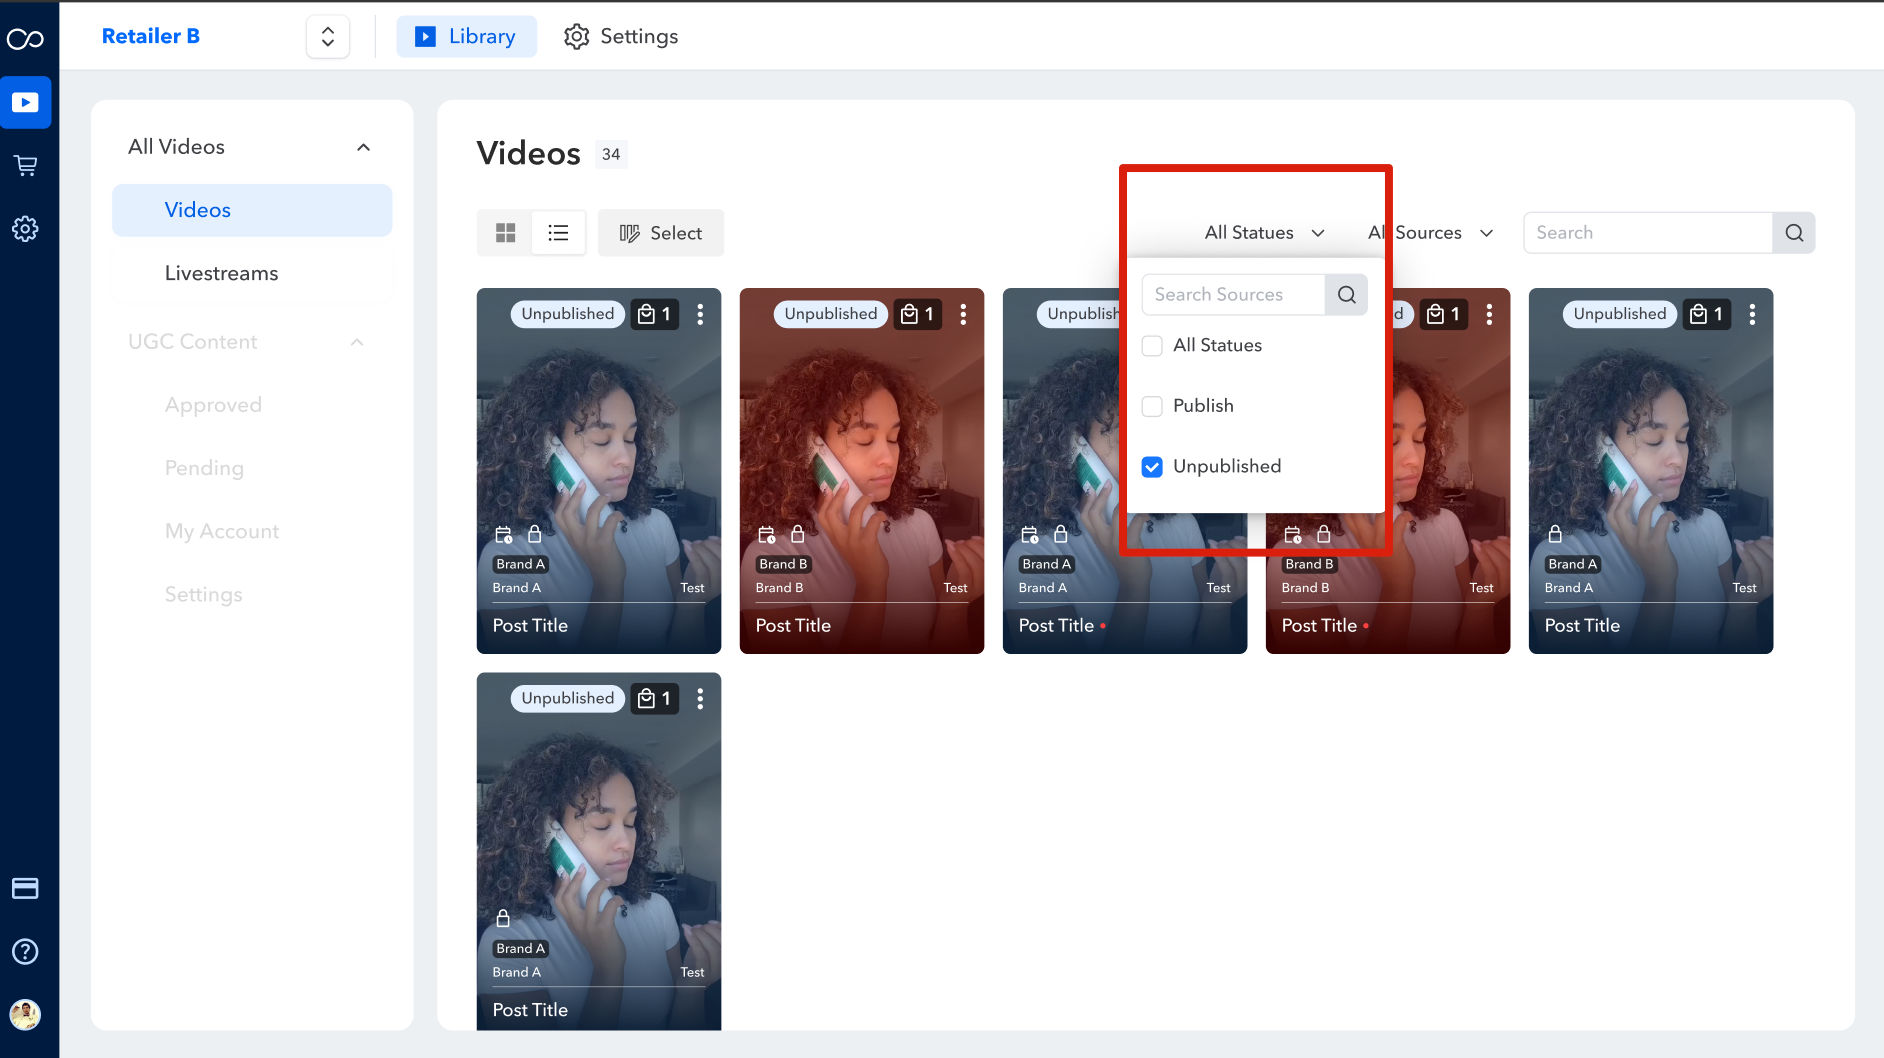
- Review any videos with an Unpublished status and publish them if needed.
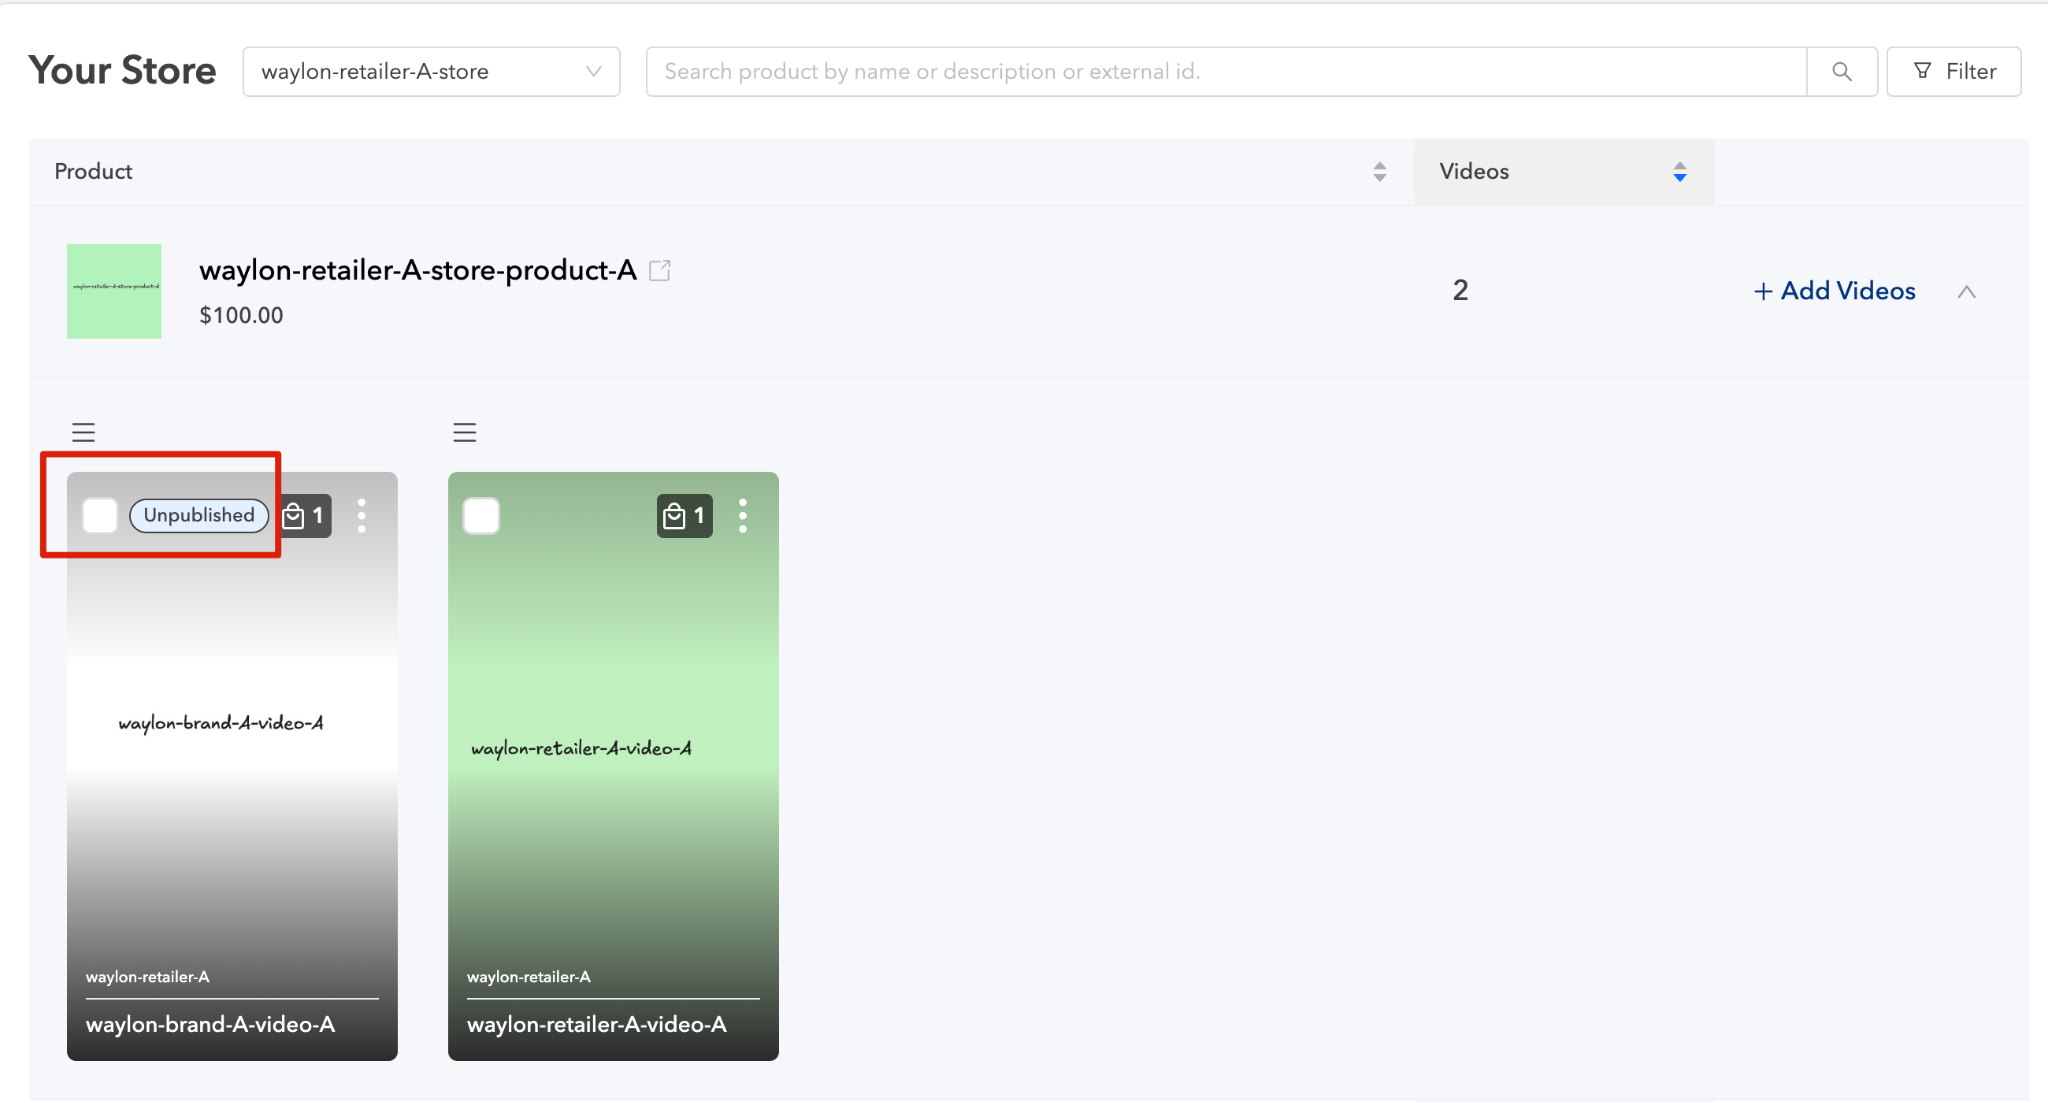
To check from "Products": go to "Video" > "Products" and click on the target product.
4.2.2 Publish a video
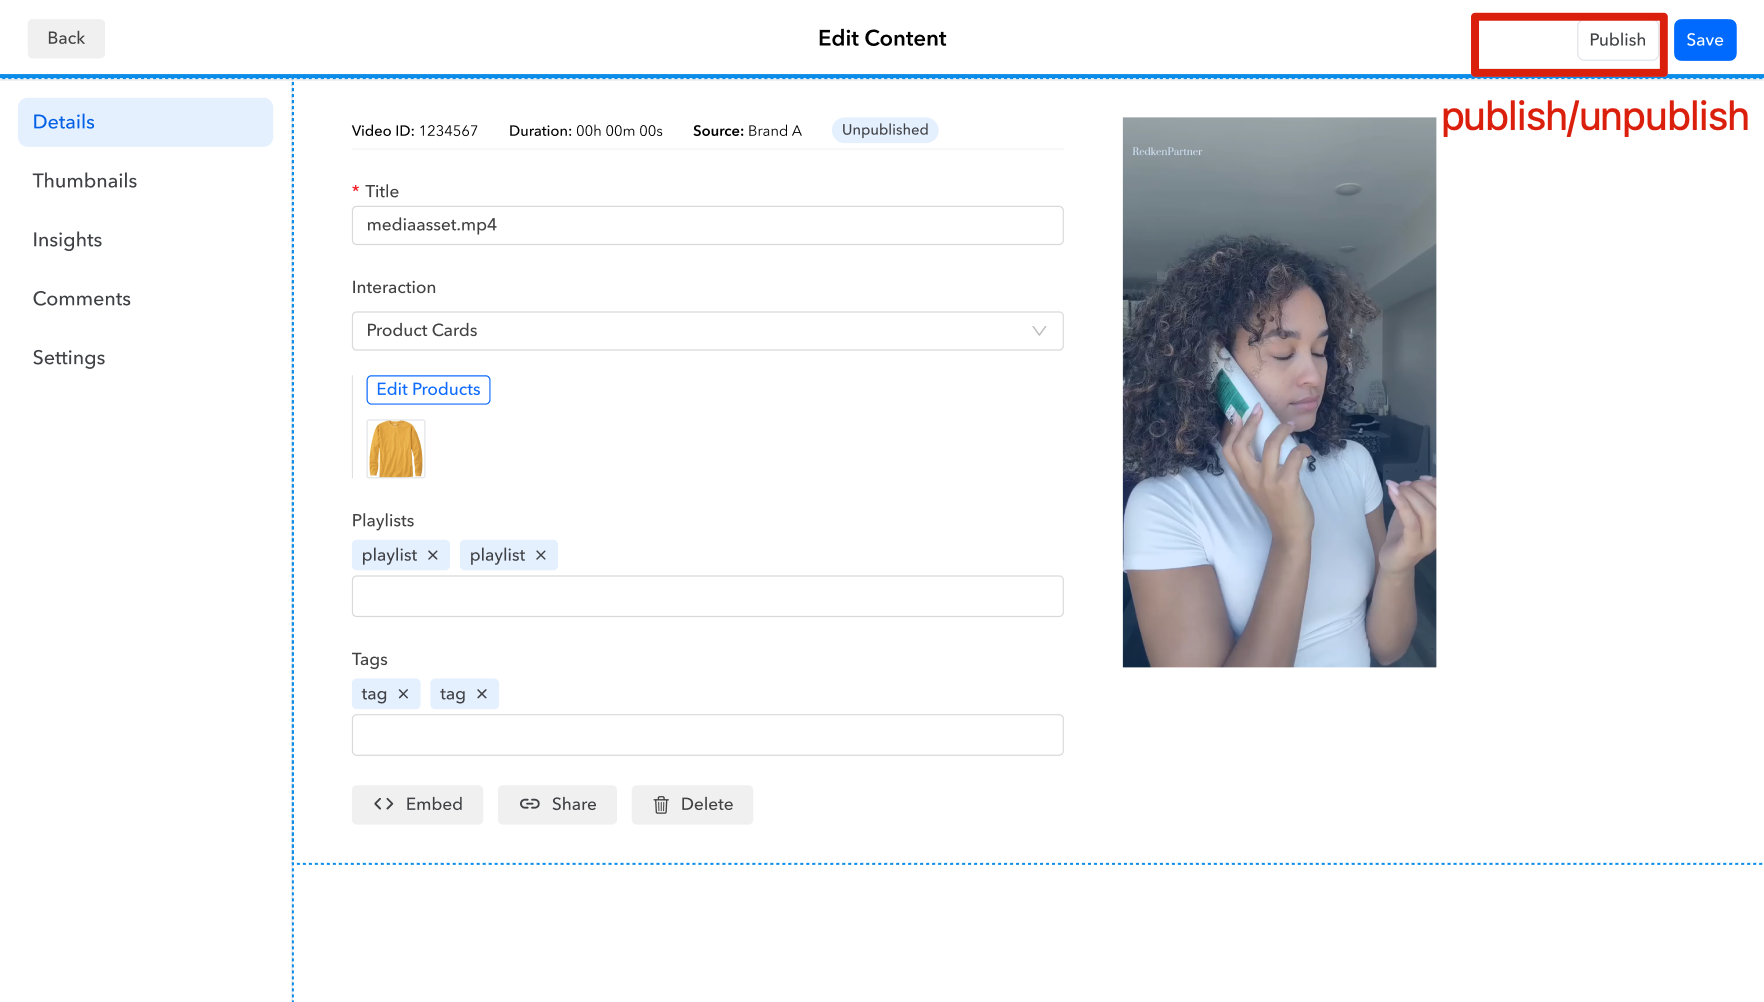
- Select a video with an Unpublished status.
- Review the video content to ensure everything is correct.
- If no changes are needed, click Publish in the upper-right corner of the page.
- Once the video is published, its status will change to Published, and the video will appear on your site.
4.3 View video insights
To monitor video performance and engagement, refer to the following guides:
5. Set up and activate AI Virtual Assistant (AVA)
5.1 Create an AVA and assign products
To create and configure your AI Virtual Assistant, follow the instructions in Setup and Display AI Virtual Assistant (AVA 4.0), specifically the following sections:
- Create AVA
- Configure Settings
- Customize
If you'd like to display a disclaimer in the chat experience, refer to Add Disclaimers in Chat for AVA.
After completing the AVA setup:
- Navigate to Knowledge > Add Products.
- Select and assign the products you want the AVA to support.
5.2 Configure the Product FAQ Widget and embed AVA
To configure and embed the AI Virtual Assistant, follow the instructions in How to Embed AVA 4.0 on Your Website, specifically the following sections:
- Embed AVA
- Display Product FAQs
- Questions
- Styling
- Native Button
After completing the Product FAQ Widget configuration:
- Click Embed Code in the upper-right corner of the page.
- Copy the generated embed code.
- Paste the code into your website.
Note: If you are embedding AVA on a Product Detail Page (PDP), refer to Embedding AI FAQ Within the Product Detail Page.
5.3 Review and activate Brand resources
Refer to Setup and Display AI Virtual Assistant (AVA 4.0), specifically the Resource Management section.
- Review the resources associated with each product provided by the Brand.
- If the resources are accurate and complete, change their status from Pending to Active.
5.4 Add additional resources
If you want to provide your own resources in addition to those supplied by the Brand, add them to the appropriate category:
- Products
- Brand
- Store Policy
- Support
For instructions on adding resources, refer to Setup and Display AI Virtual Assistant (AVA 4.0), specifically the Knowledge and Resource Types sections.
5.5 Test AVA responses in Playground
Refer to the Playground section of Setup and Display AI Virtual Assistant (AVA 4.0).
Test the AVA by asking sample questions and reviewing its responses. If the responses need improvement, add or update resources as needed, then test again until the desired results are achieved.
5.6 Publish and activate AVA
Once you've verified that the AVA is configured correctly:
- Navigate to the Overview page.
- Click Publish in the upper-right corner.
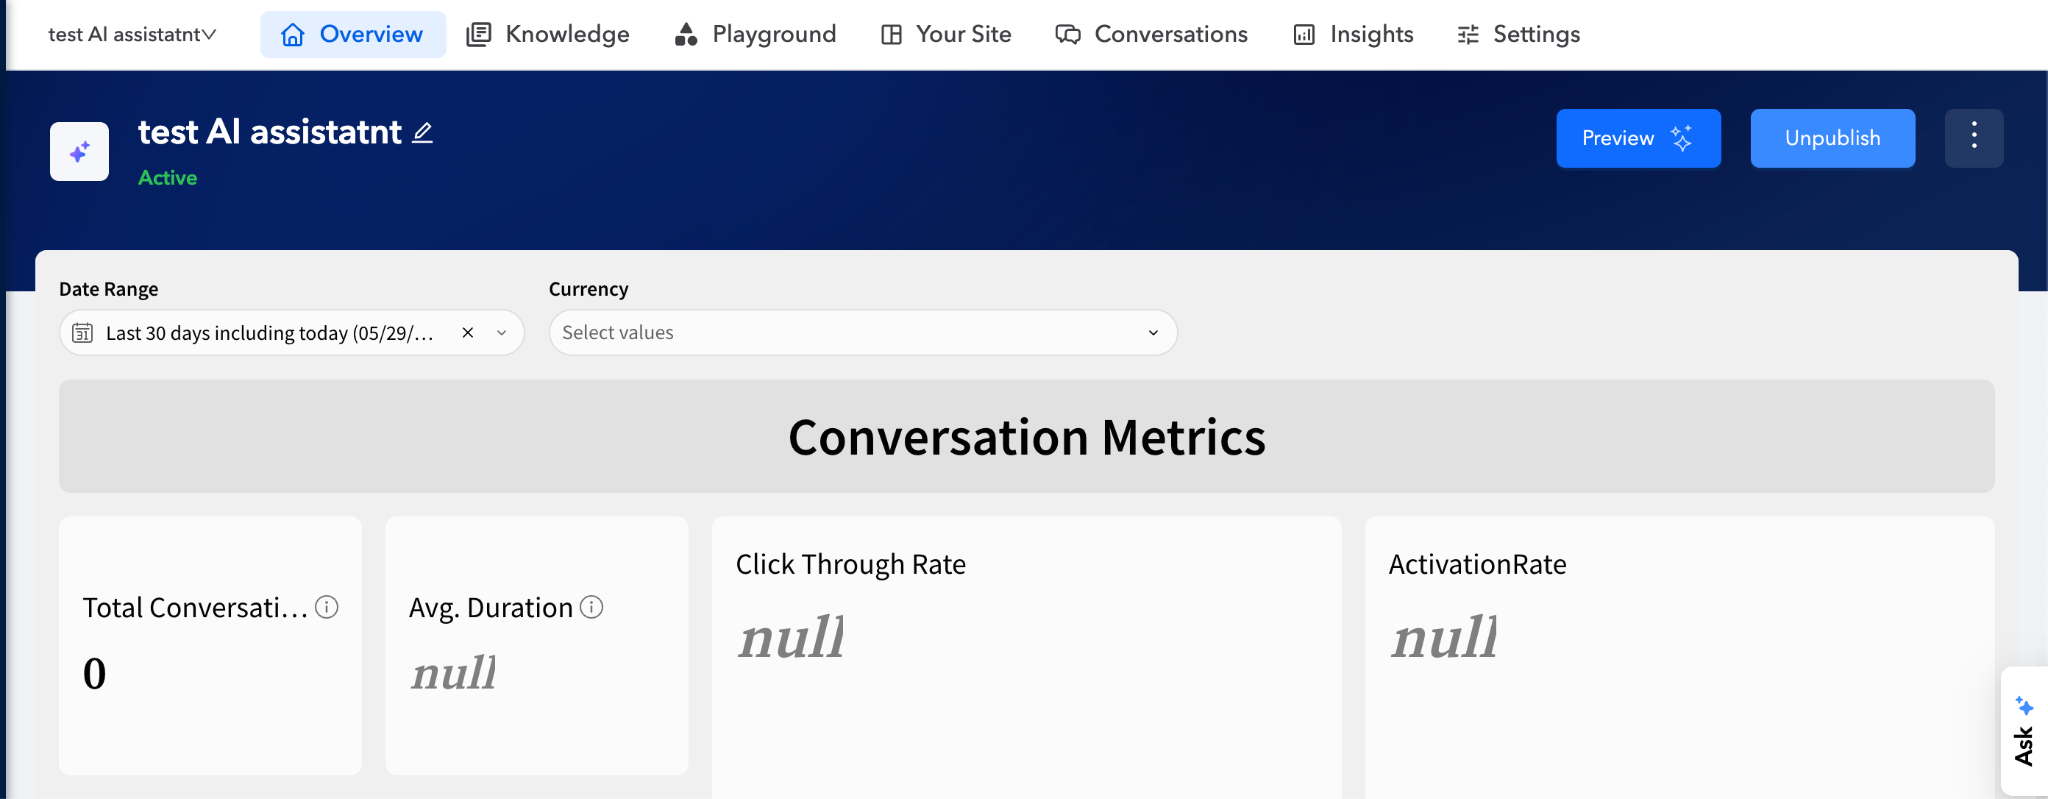
After publishing, the AVA is activated and ready for use on your website.
5-7. Manage AVA conversations
Please refer to AVA Conversation History.
5-8. View AVA insights
Please refer to Navigate AVA Insight Dashboard.
For each metric in the insight dashboard, please refer to AVA Analytics Glossary.