Configuration et affichage de l'assistant virtuel AI (AVA)
Learn how to set up your AVA and build their knowledge around your products!

Build your AVA and Upload Products
Note: You are viewing instructions for the Old UI of the AI Virtual Assistant (AVA).
If you are using the updated version, please see: Setup and Display AI Virtual Assistant (AVA) – New UI
Step #1
Select AI Video Assistant from the toolbar in the Business Portal.
Step #2
Click on Create New Assistant and select the assistant profile for your product and click Add Expertise.

Step #3
Next, specify the areas of expertise for your assistant and select a product that will enable them to provide precise and helpful guidance to your customers.
Step #4
Assign a name to your assistant, provide a description, customize the initial greeting, and set up follow-up greetings for returning users.
Step #5
Select your Store and choose which product you want to use AVA for, then click Add.
Step #6
After completing the addition of these details, proceed by clicking on the Personalize Appearance option.
Step #7
Choose a solid background colour for the assistant.
Step #8
You can also select the default interaction mode, which determines the initial input preference that shoppers will encounter. They will have the option to switch between text input and audio input during the conversation.
Step #9
Upload a Custom Image: This image will serve as a replacement for the default digital human avatar in the user interface, allowing you to personalize the appearance of your assistant.
Click on Create Avatar once done.
You can add multiple products to AVA by following the steps outlined here.

Provide AVA With Resource and Product Knowledge
Once you are on the AVA details page, locate the Resources menu on the left sidebar. Click on it, then select Add Resources+ to begin uploading your Video, Text, File or URL.
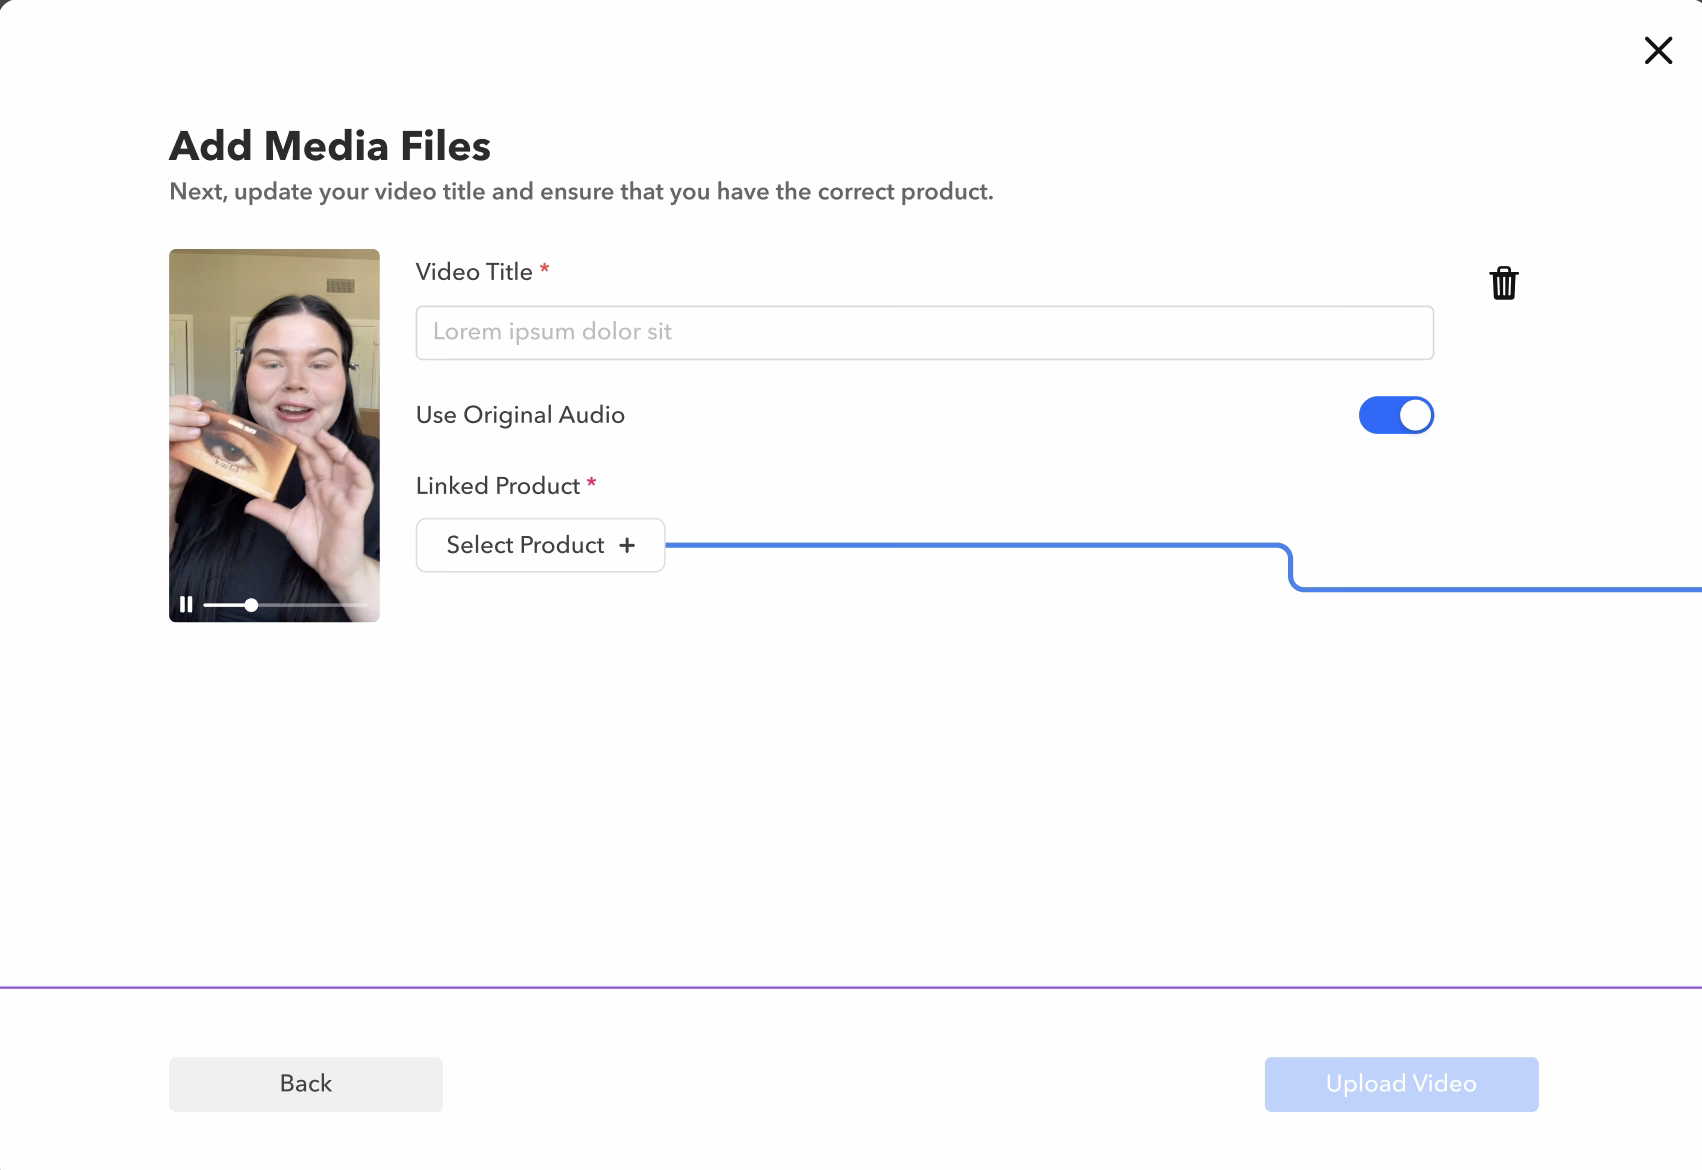
Video/Image

- Easily add your video files by dragging and dropping, or selecting from your device.
- Enter the video Title and Toggle Use Original Audio to On to provide the original audio for this video. Otherwise Ava will talk over the video if a response is provided.
- Once the video is uploaded and information is added, select Add Video.
- You can also include product in your video by clicking the edit option next to the video and selecting the desired product from the dropdown menu. You can select only one product as per the video (Please note that only products already added to AVA will be displayed in this list)

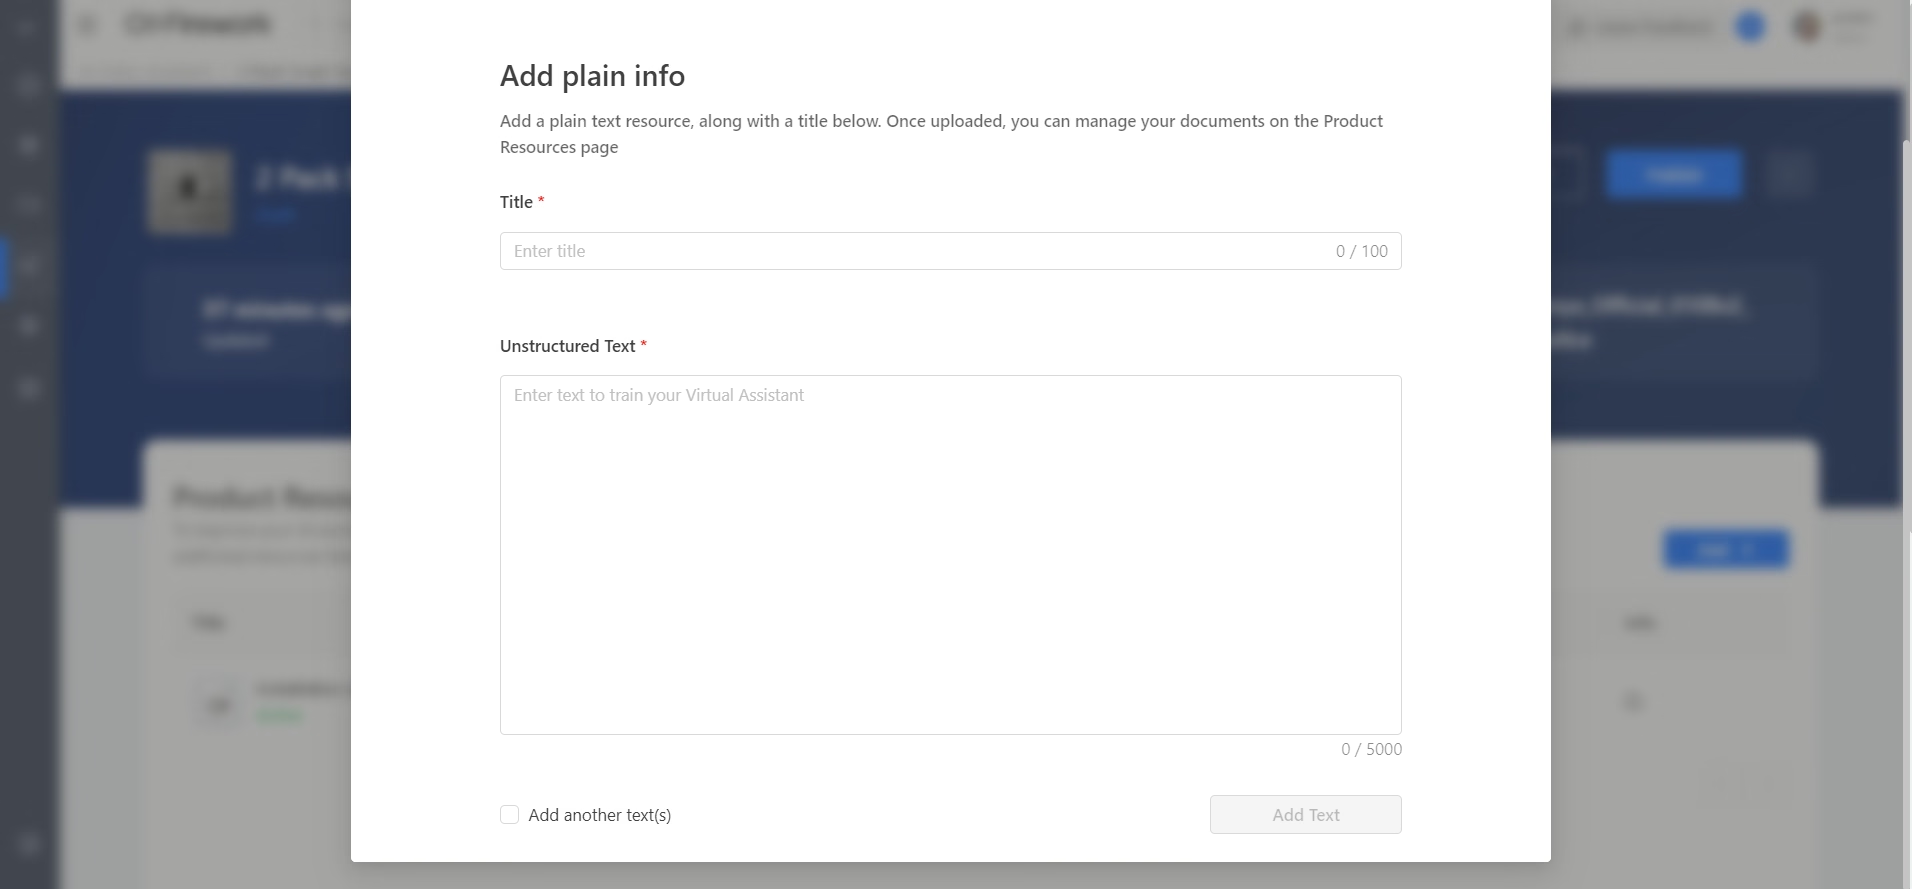
Plain Text
Title = this section serves as the question the user will ask.
Unstructured Text = this will be the answer that AVA will refer to.
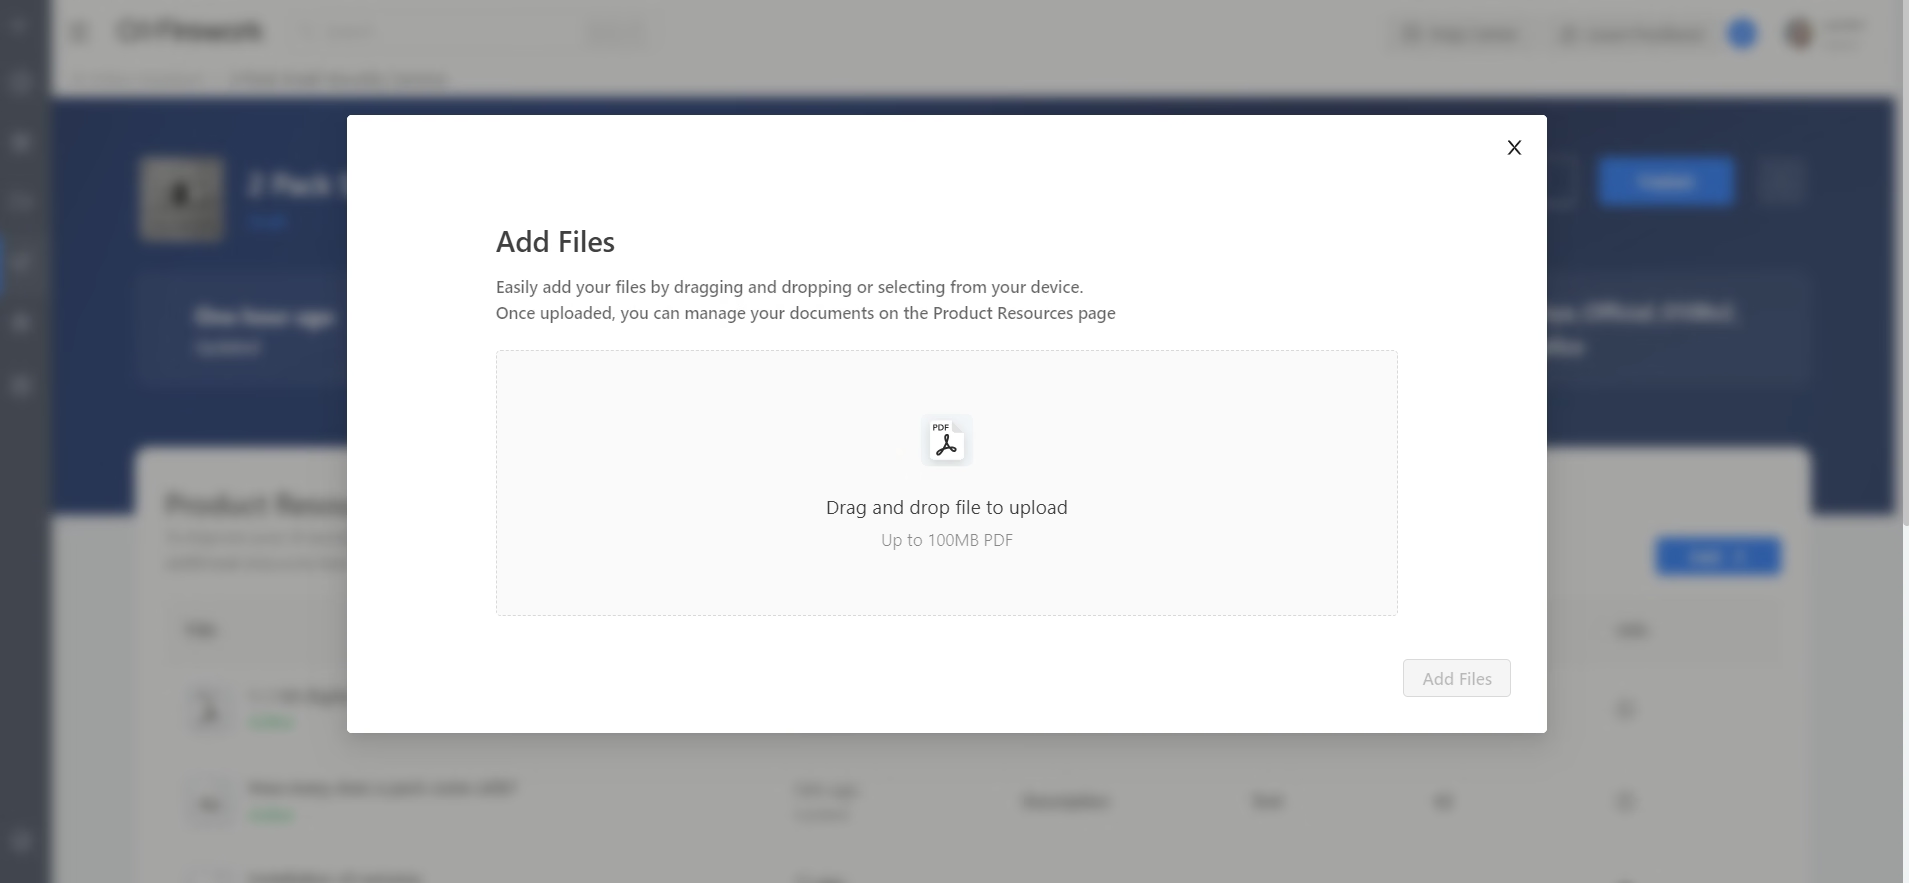
File
- AVA will provide a reference link
- Drag or click to upload a file. It must be a PDF only.
- Once uploaded, you can manage your documents on the Product Resources page
Import from SV
- Directly import short videos from your channel. Search and select videos. Note: this will not showcase interactions previously added to videos.
- Adjust the video Title and Toggle Use Original Audio to On to provide the original audio for this video. Otherwise AVA will talk over the video if a response is provided.
- Once the video is uploaded and information is added, select Add Video.

Webpage
You can input the desired web link to include it as a resource. After the upload is complete, you will have the ability to manage your documents on the Product Resources page. Click on Add another URL after submission if you wish to add more URL and then click on Save.

Upload Requirements
Video (Media Files): Up to 300mb MP4, MOV, WMV, FLV, AVI, PNG, JPG, JPEG
Plain Text: Title & Unstructured Text
File: 100mb PDF
Import from SV (Short Video): Select from Video Library
Webpage: URL
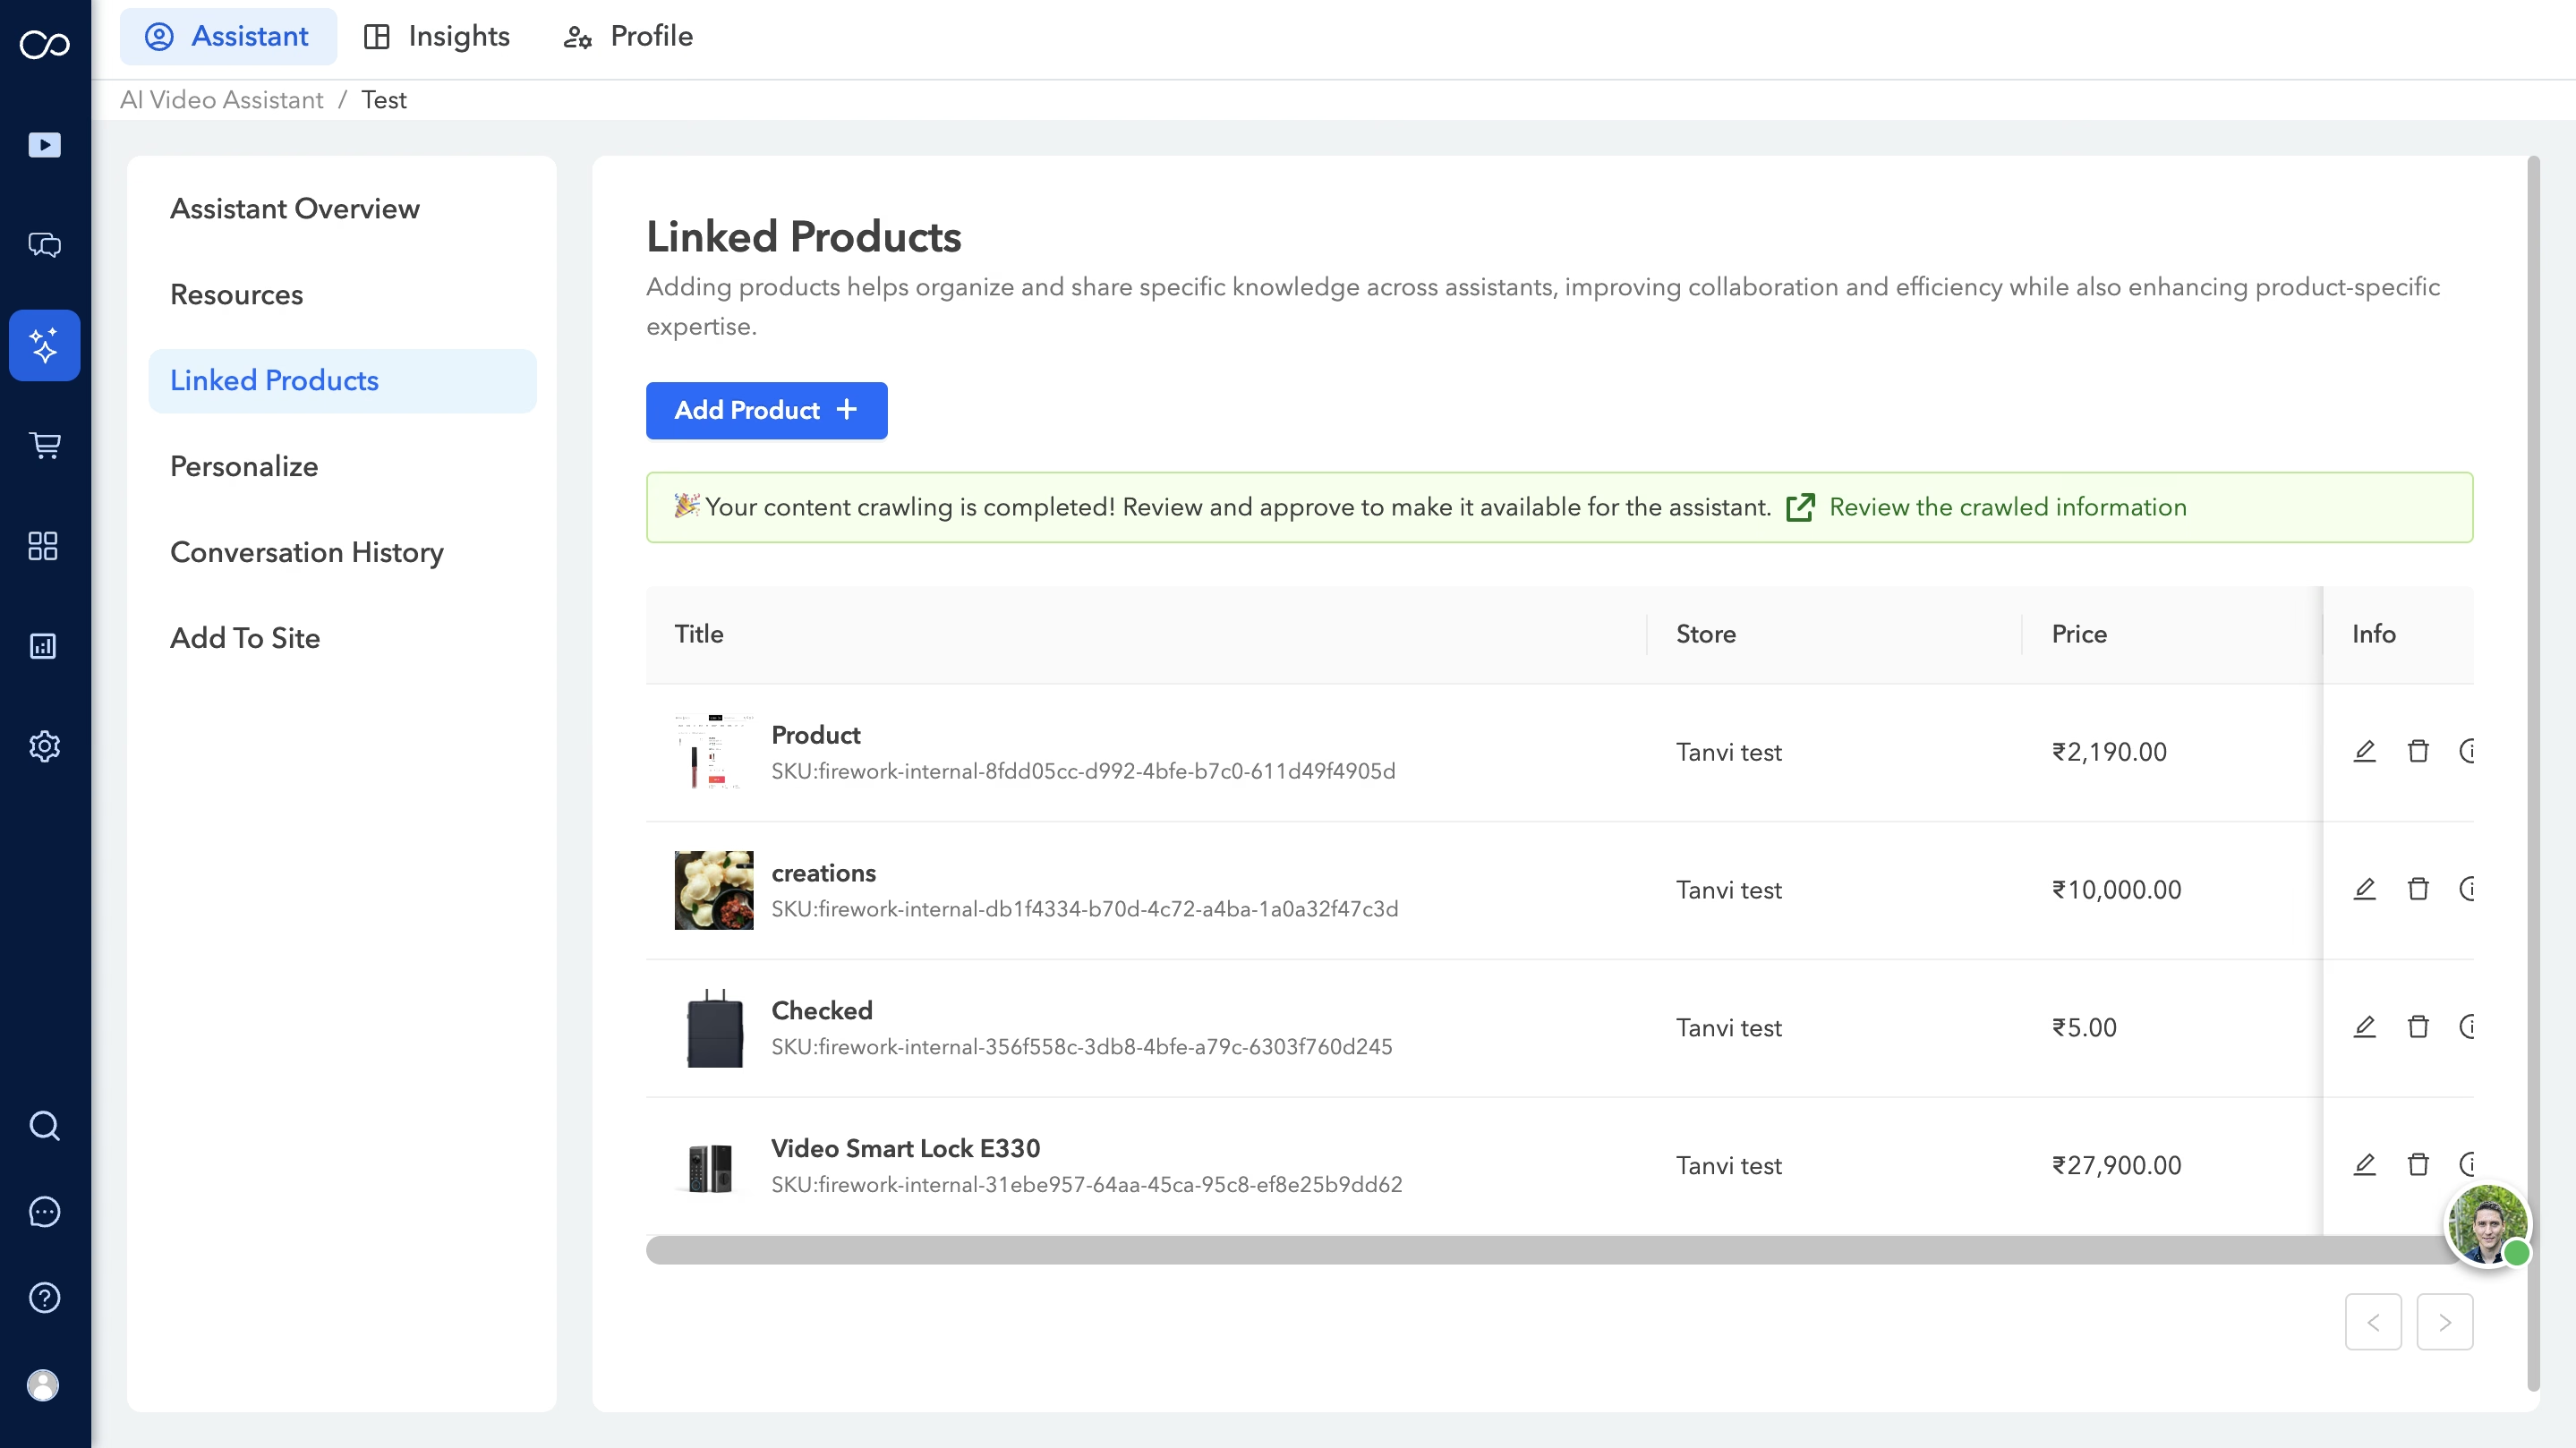
Add Products
To include additional products for your AVA, simply navigate to the Linked Products section on the left sidebar and click on the Add Products+ button.
One click Crawling
When a user imports a product into AVA, we now automatically crawl the PDP (if available) to retrieve FAQs and product comparisons.
- Import Products – Click Linked Products > Ajouter un produit (+) à importer dans AVA.
- Auto-Crawling — AVA explore automatiquement le PDP (si disponible) pour les FAQ et les comparaisons de produits.
- Contenu de la révision — Un message vous confirmera que vous avez terminé. Cliquez Passez en revue les informations explorées pour modifier, supprimer ou sélectionner des ressources.
- Ajouter des ressources — Sélectionnez les ressources et cliquez sur Ajouter des ressources pour finaliser les sélections.
- Ajouter des ressources — Sélectionnez les ressources et cliquez sur Ajouter des ressources pour finaliser les sélections.
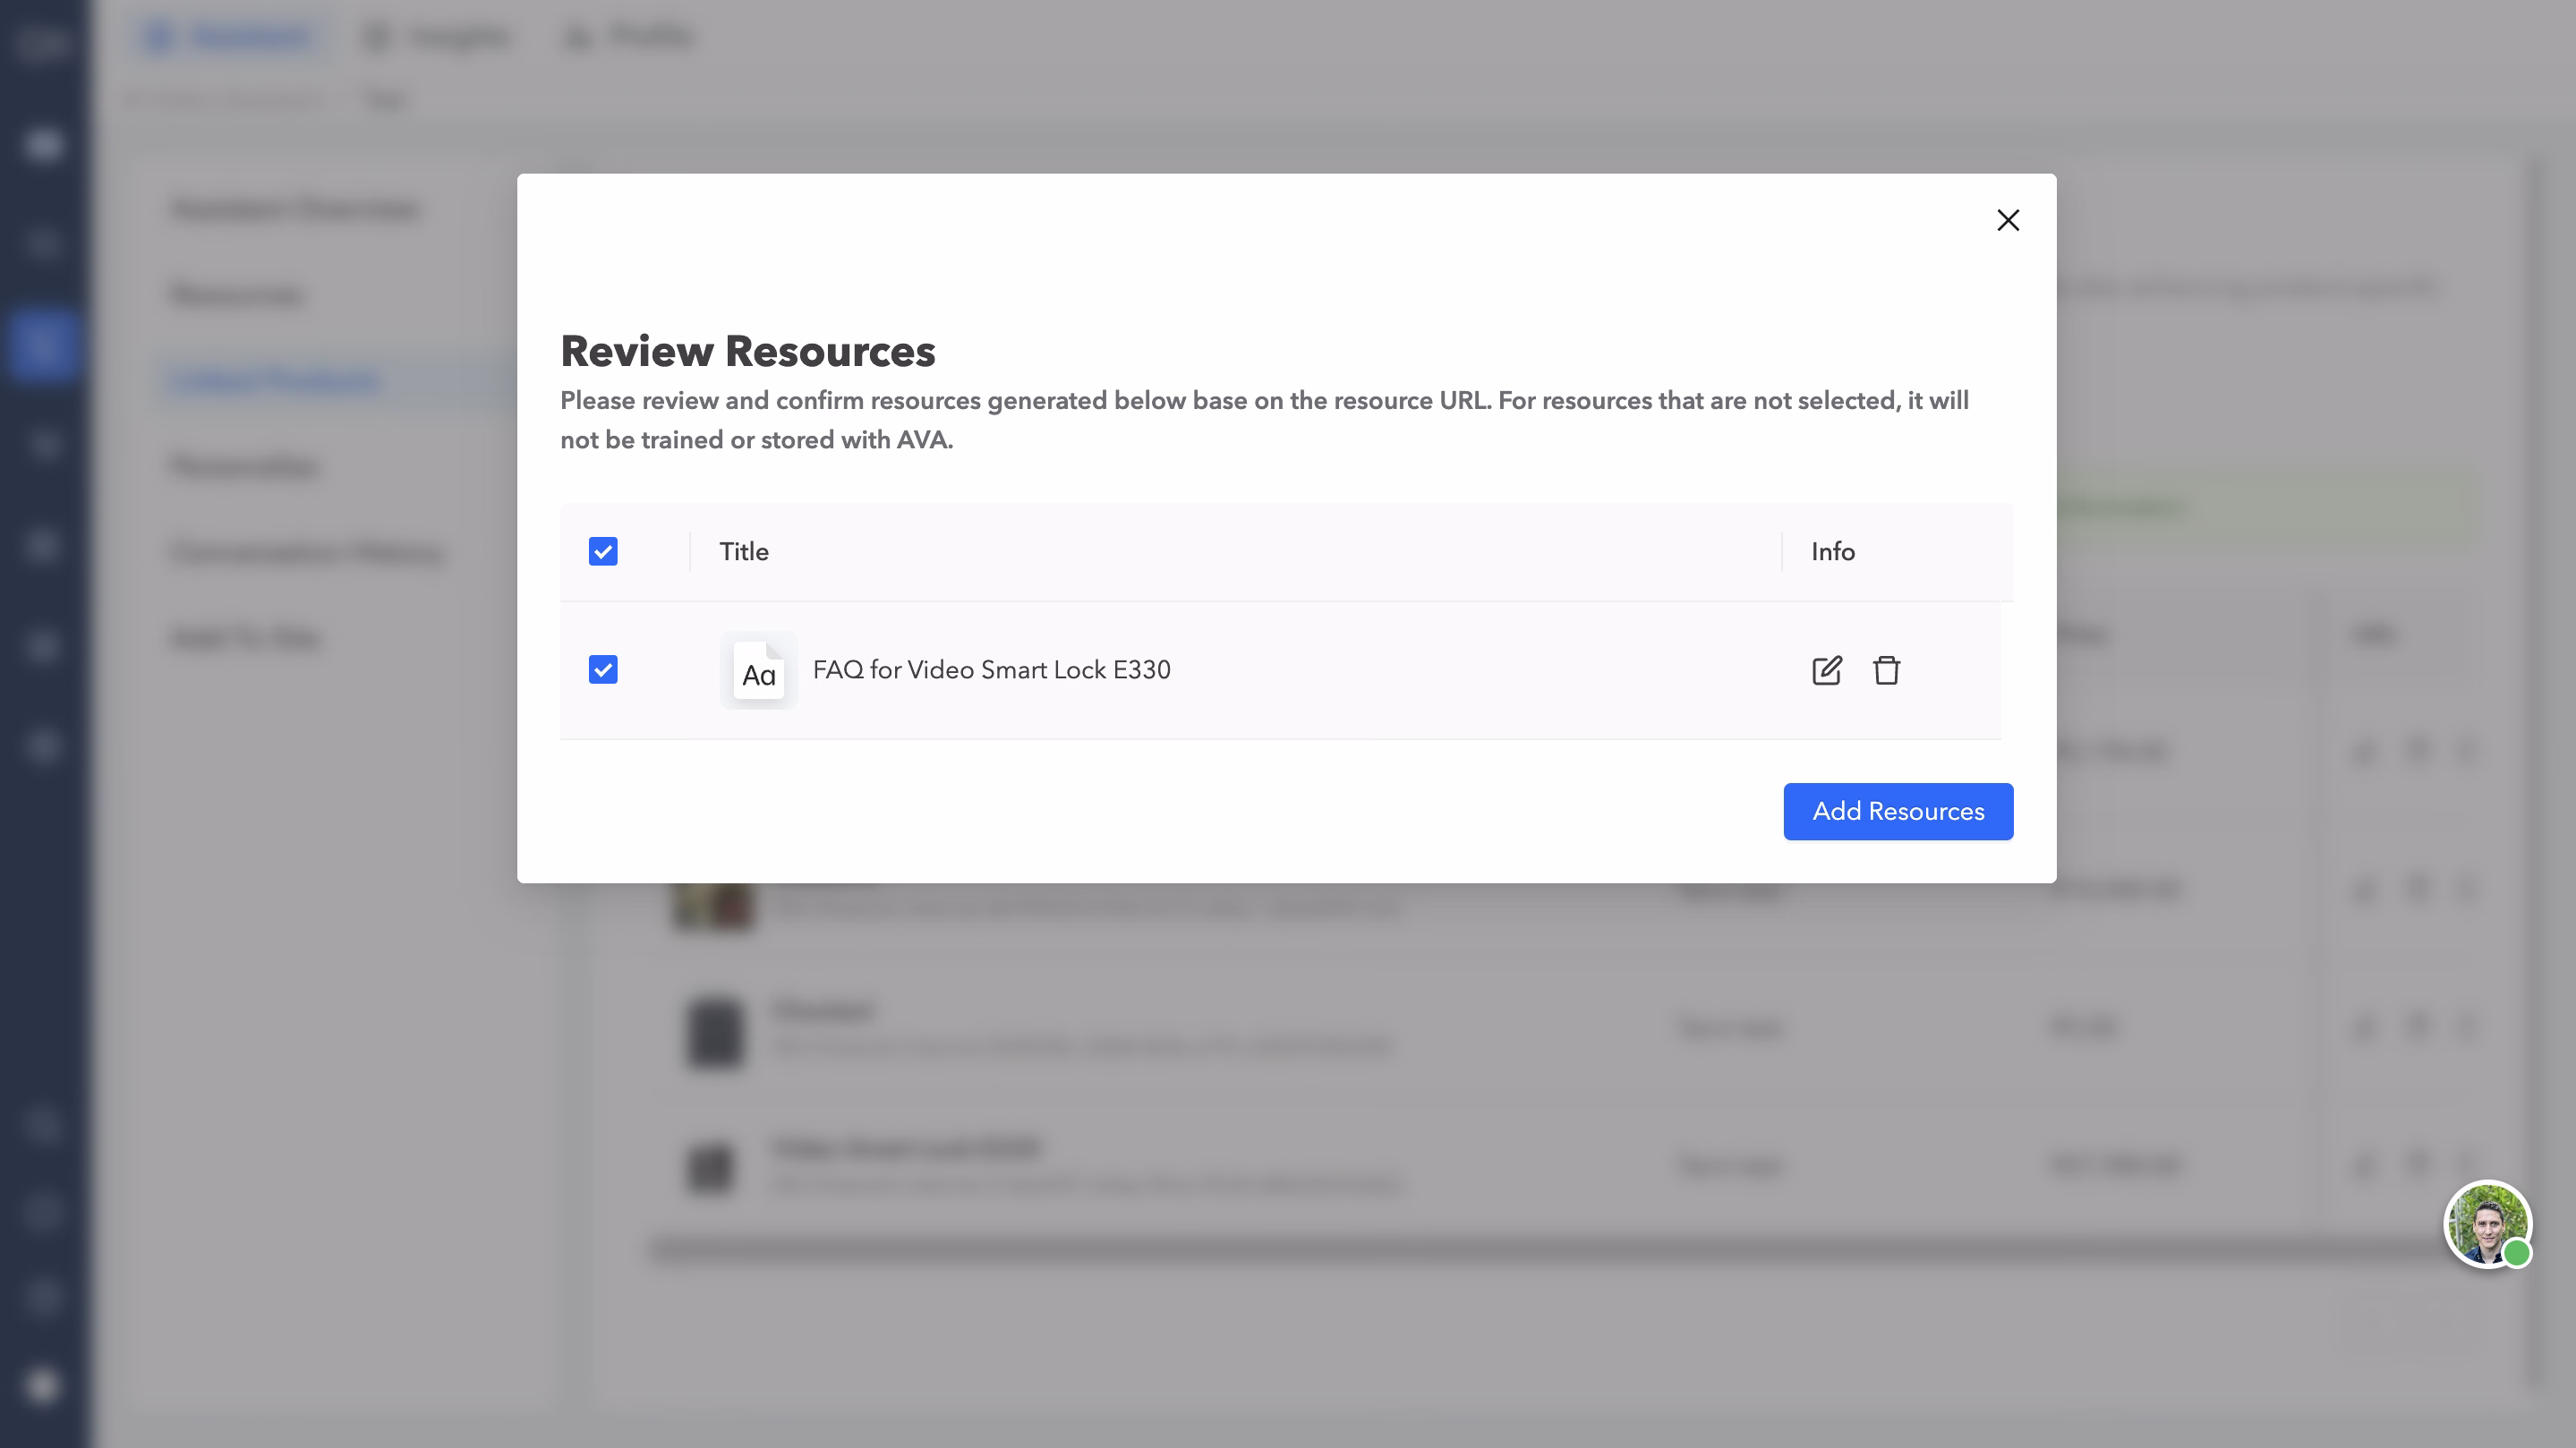
- Confirmer la sélection — Seules les ressources sélectionnées seront stockées et entraînées avec AVA.
- La section Ajouter des ressources sera disponible dans la section Ressources.
Personnalisez
Cette fonctionnalité vous permet de personnaliser l'apparence et la personnalité de votre assistant pour une expérience plus personnalisée. Vous pouvez modifier le nom, la description, les salutations, la couleur d'arrière-plan et le mode d'interaction par défaut de l'assistant, ce qui permet aux acheteurs de basculer entre la saisie de texte et la saisie audio pendant les conversations.

Historique des conversations
Vous pourrez accéder à tout l'historique des conversations et le consulter pour obtenir des informations précieuses et améliorer la qualité des interactions avec les utilisateurs. Vous avez également la possibilité d'exporter les conversations.
Pour plus d'informations, veuillez consulter le guide sur l'historique des conversations. - lien
Ajouter au site
Vous pouvez intégrer votre AVA à votre site Web à partir de cette section, ce qui renforcera l'engagement des utilisateurs et améliorera le support client. Découvrez comment intégrer Ava à votre site Web - lien
Vous pouvez prévisualiser votre AVA en sélectionnant l'option Aperçu située sur le côté droit du Présentation de l'assistant. En cliquant sur le bouton Publier, vous rendrez votre AVA en ligne et accessible aux utilisateurs pour qu'ils puissent interagir avec elle.
