AIバーチャルアシスタント(AVA)を設定・表示する方法
AVAを設定し、商品に関する知識を構築する方法をご紹介します。

AVAを構築し、商品をアップロードする
ご注意:このヘルプ記事はAIバーチャルアシスタント(AVA)の旧UIの手順です。
最新のUIをご利用の場合は、AIバーチャルアシスタント(AVA)の設定と表示—新UIをご参照ください。
①ビジネスポータルのツールバーから「AI動画アシスタント」を選択します。
②「新しいアシスタントを作成」をクリックし、商品に合ったアシスタントプロフィールを選択して「専門分野を追加」をクリックします。

③次に、アシスタントの専門分野を指定し、お客様に正確で役に立つ案内を提供できるようにする商品を選択します。
④アシスタントに名前をつけ、説明文を入力し、最初の挨拶をカスタマイズし、再訪ユーザー向けのフォローアップ挨拶も設定します。
⑤「ストア」を選択し、AVAを使用したい商品を選んで「追加」をクリックします。
⑥これらの詳細情報の入力が完了したら、「外観をパーソナライズ」オプションをクリックします。
⑦アシスタントの背景色を単一の色から選択します。
⑧デフォルトの入力方法(ショッパーが最初に目にする入力方法)も選択できます。会話中はテキスト入力と音声入力を切り替えられます。
⑨カスタム画像のアップロード:この画像は、UI内のデフォルトのデジタルヒューマンアバターの代わりに使用され、アシスタントの見た目をパーソナライズできます。
完了したら「アバターを作成」をクリックします。
AVAに複数の商品を追加する方法はこちらをご覧ください。

AVAにリソースと商品知識を与える
AVAの詳細ページで、左側サイドバーの「リソース」メニューをクリックし、「リソースを追加+」を選択して動画・テキスト・ファイル・URLのアップロードを始めます。
動画/画像

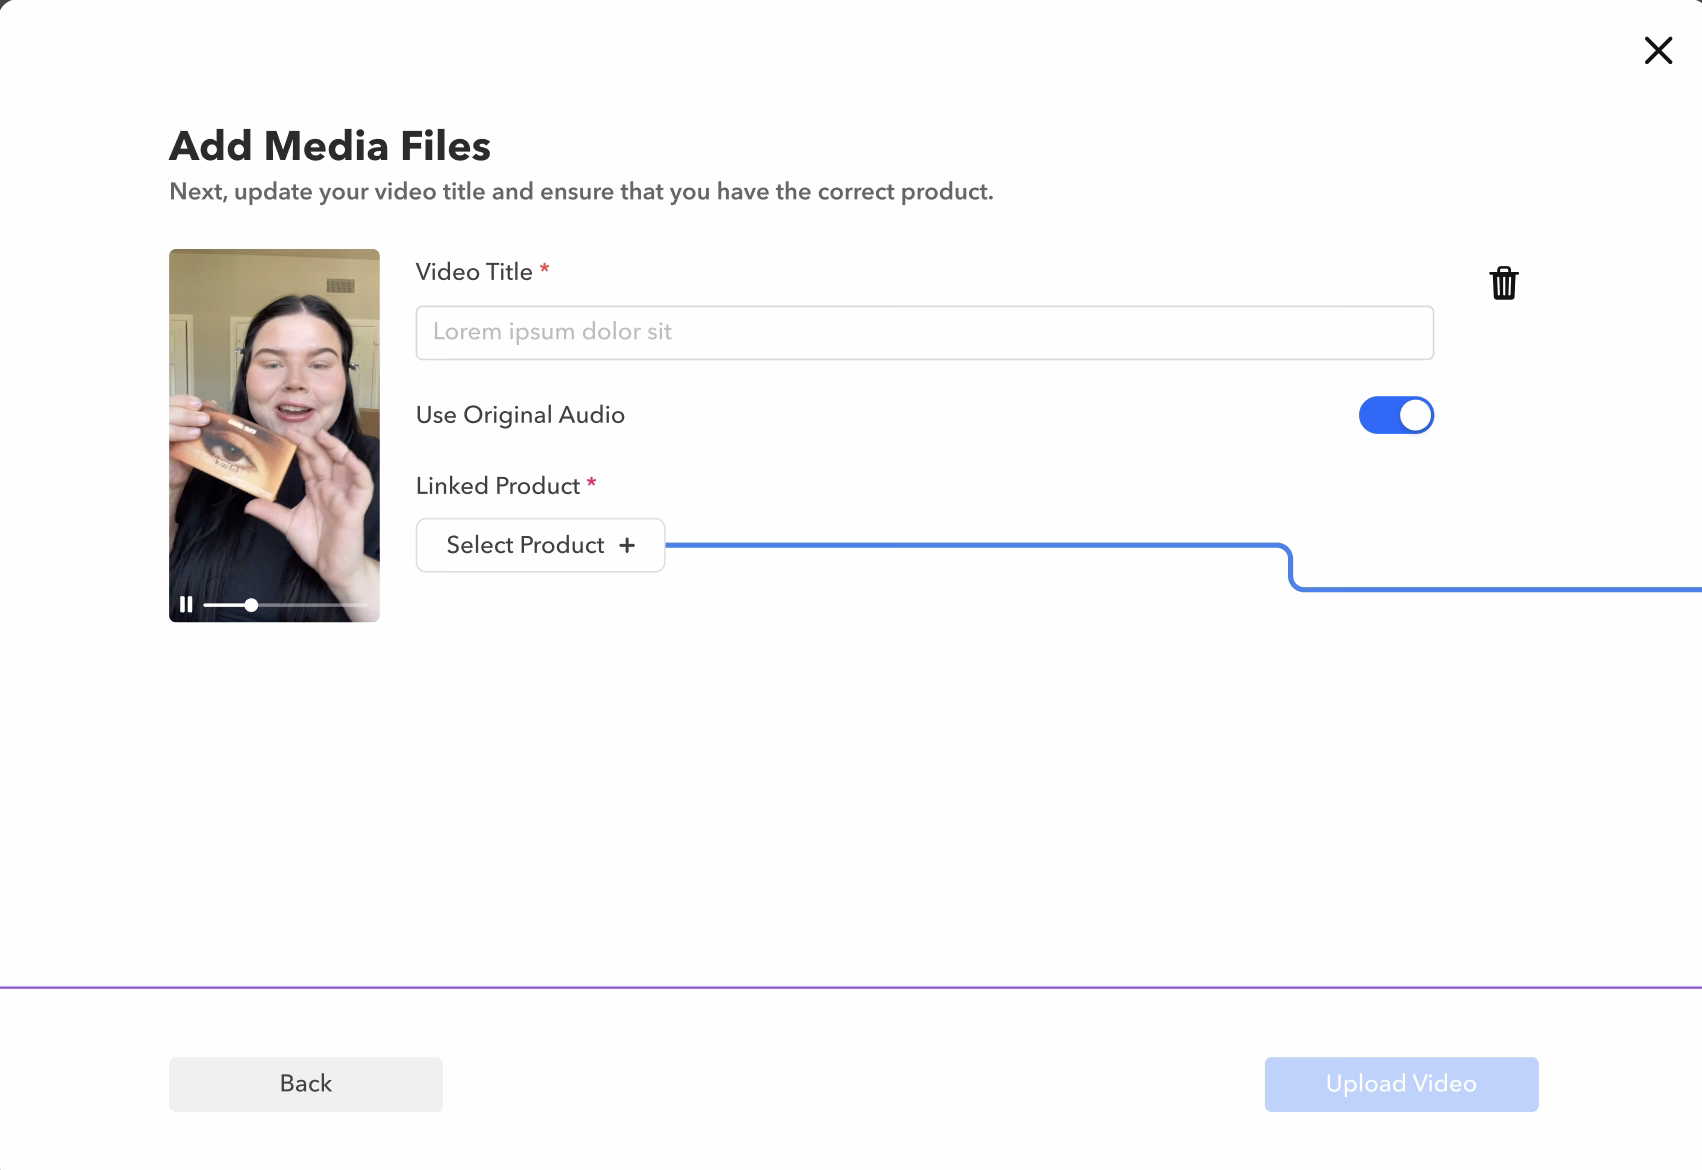
①動画ファイルはドラッグ&ドロップ、または端末から選択して簡単に追加できます。
②動画の「タイトル」を入力し、この動画の元の音声を使用する場合は「オリジナル音声を使用」をオンにします。オフの場合、回答があるとAVAが動画に音声をかぶせて話します。
③動画のアップロードと情報入力が完了したら、「動画を追加」を選択します。
④動画の横の編集オプションをクリックし、ドロップダウンメニューから希望の商品を選択することで、動画に商品を紐づけることもできます。選択できる商品は1動画につき1つのみです(すでにAVAに追加されている商品のみが一覧に表示されます)。

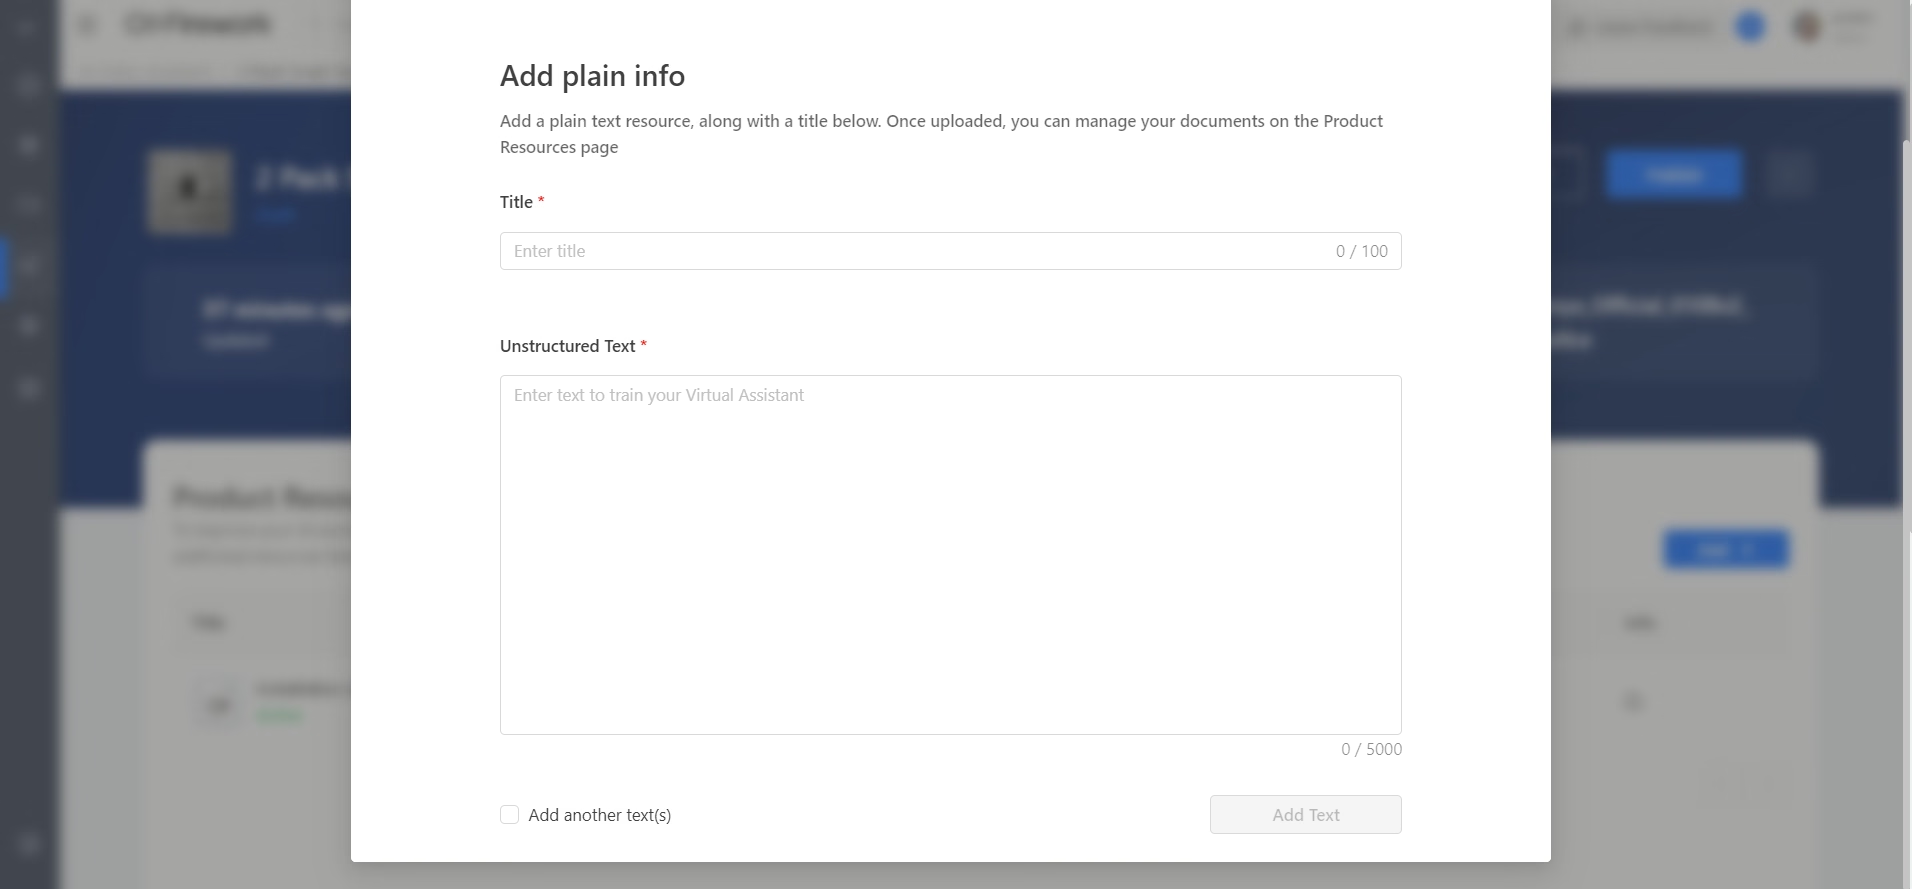
プレーンテキスト
タイトル=この項目はユーザーが尋ねる質問として機能します。
構造化されていないテキスト=AVAが回答として参照する内容です。
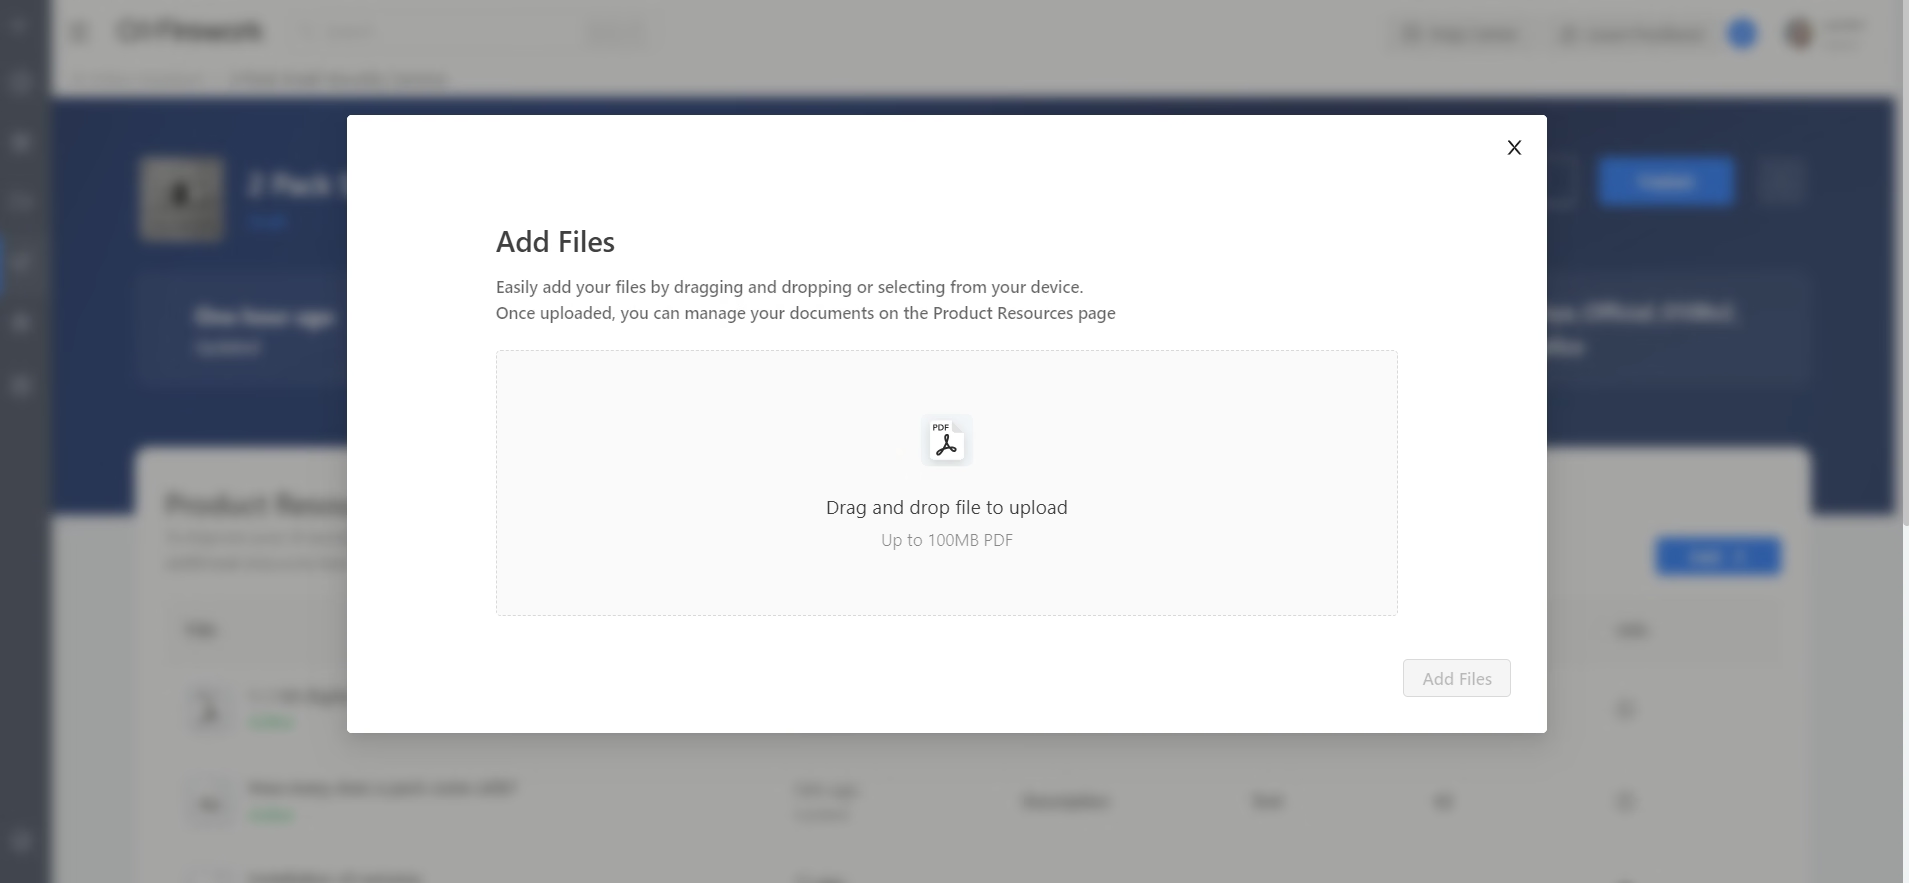
ファイル
①AVAが参照リンクを提供します。
②ファイルをドラッグするかクリックしてアップロードします。PDFファイルのみ対応しています。
③アップロード後は、商品リソースページでドキュメントを管理できます。
ショート動画からインポート
①チャンネル内のショート動画を直接インポートできます。動画を検索して選択します。ご注意:これでは以前に動画に追加したインタラクションは反映されません。
②動画の「タイトル」を変更し、この動画の元の音声を使用する場合は「オリジナル音声を使用」を「オン」にします。オフの場合、回答があるとAVAが動画に音声をかぶせて話します。
③動画のアップロードと情報入力が完了したら、「動画を追加」を選択します。

Webページ
リソースとして追加したいWebリンクを入力できます。アップロード完了後は、商品リソースページでドキュメントを管理できます。さらにURLを追加したい場合は送信後に「別のURLを追加」をクリックし、完了したら「保存」をクリックします。

アップロード要件
動画(メディアファイル):最大300MB、MP4、MOV、WMV、FLV、AVI、PNG、JPG、JPEG
プレーンテキスト:タイトルおよび構造化されていないテキスト
ファイル:最大100MBのPDF
ショート動画からインポート:動画ライブラリから選択
Webページ:URL
商品を追加する
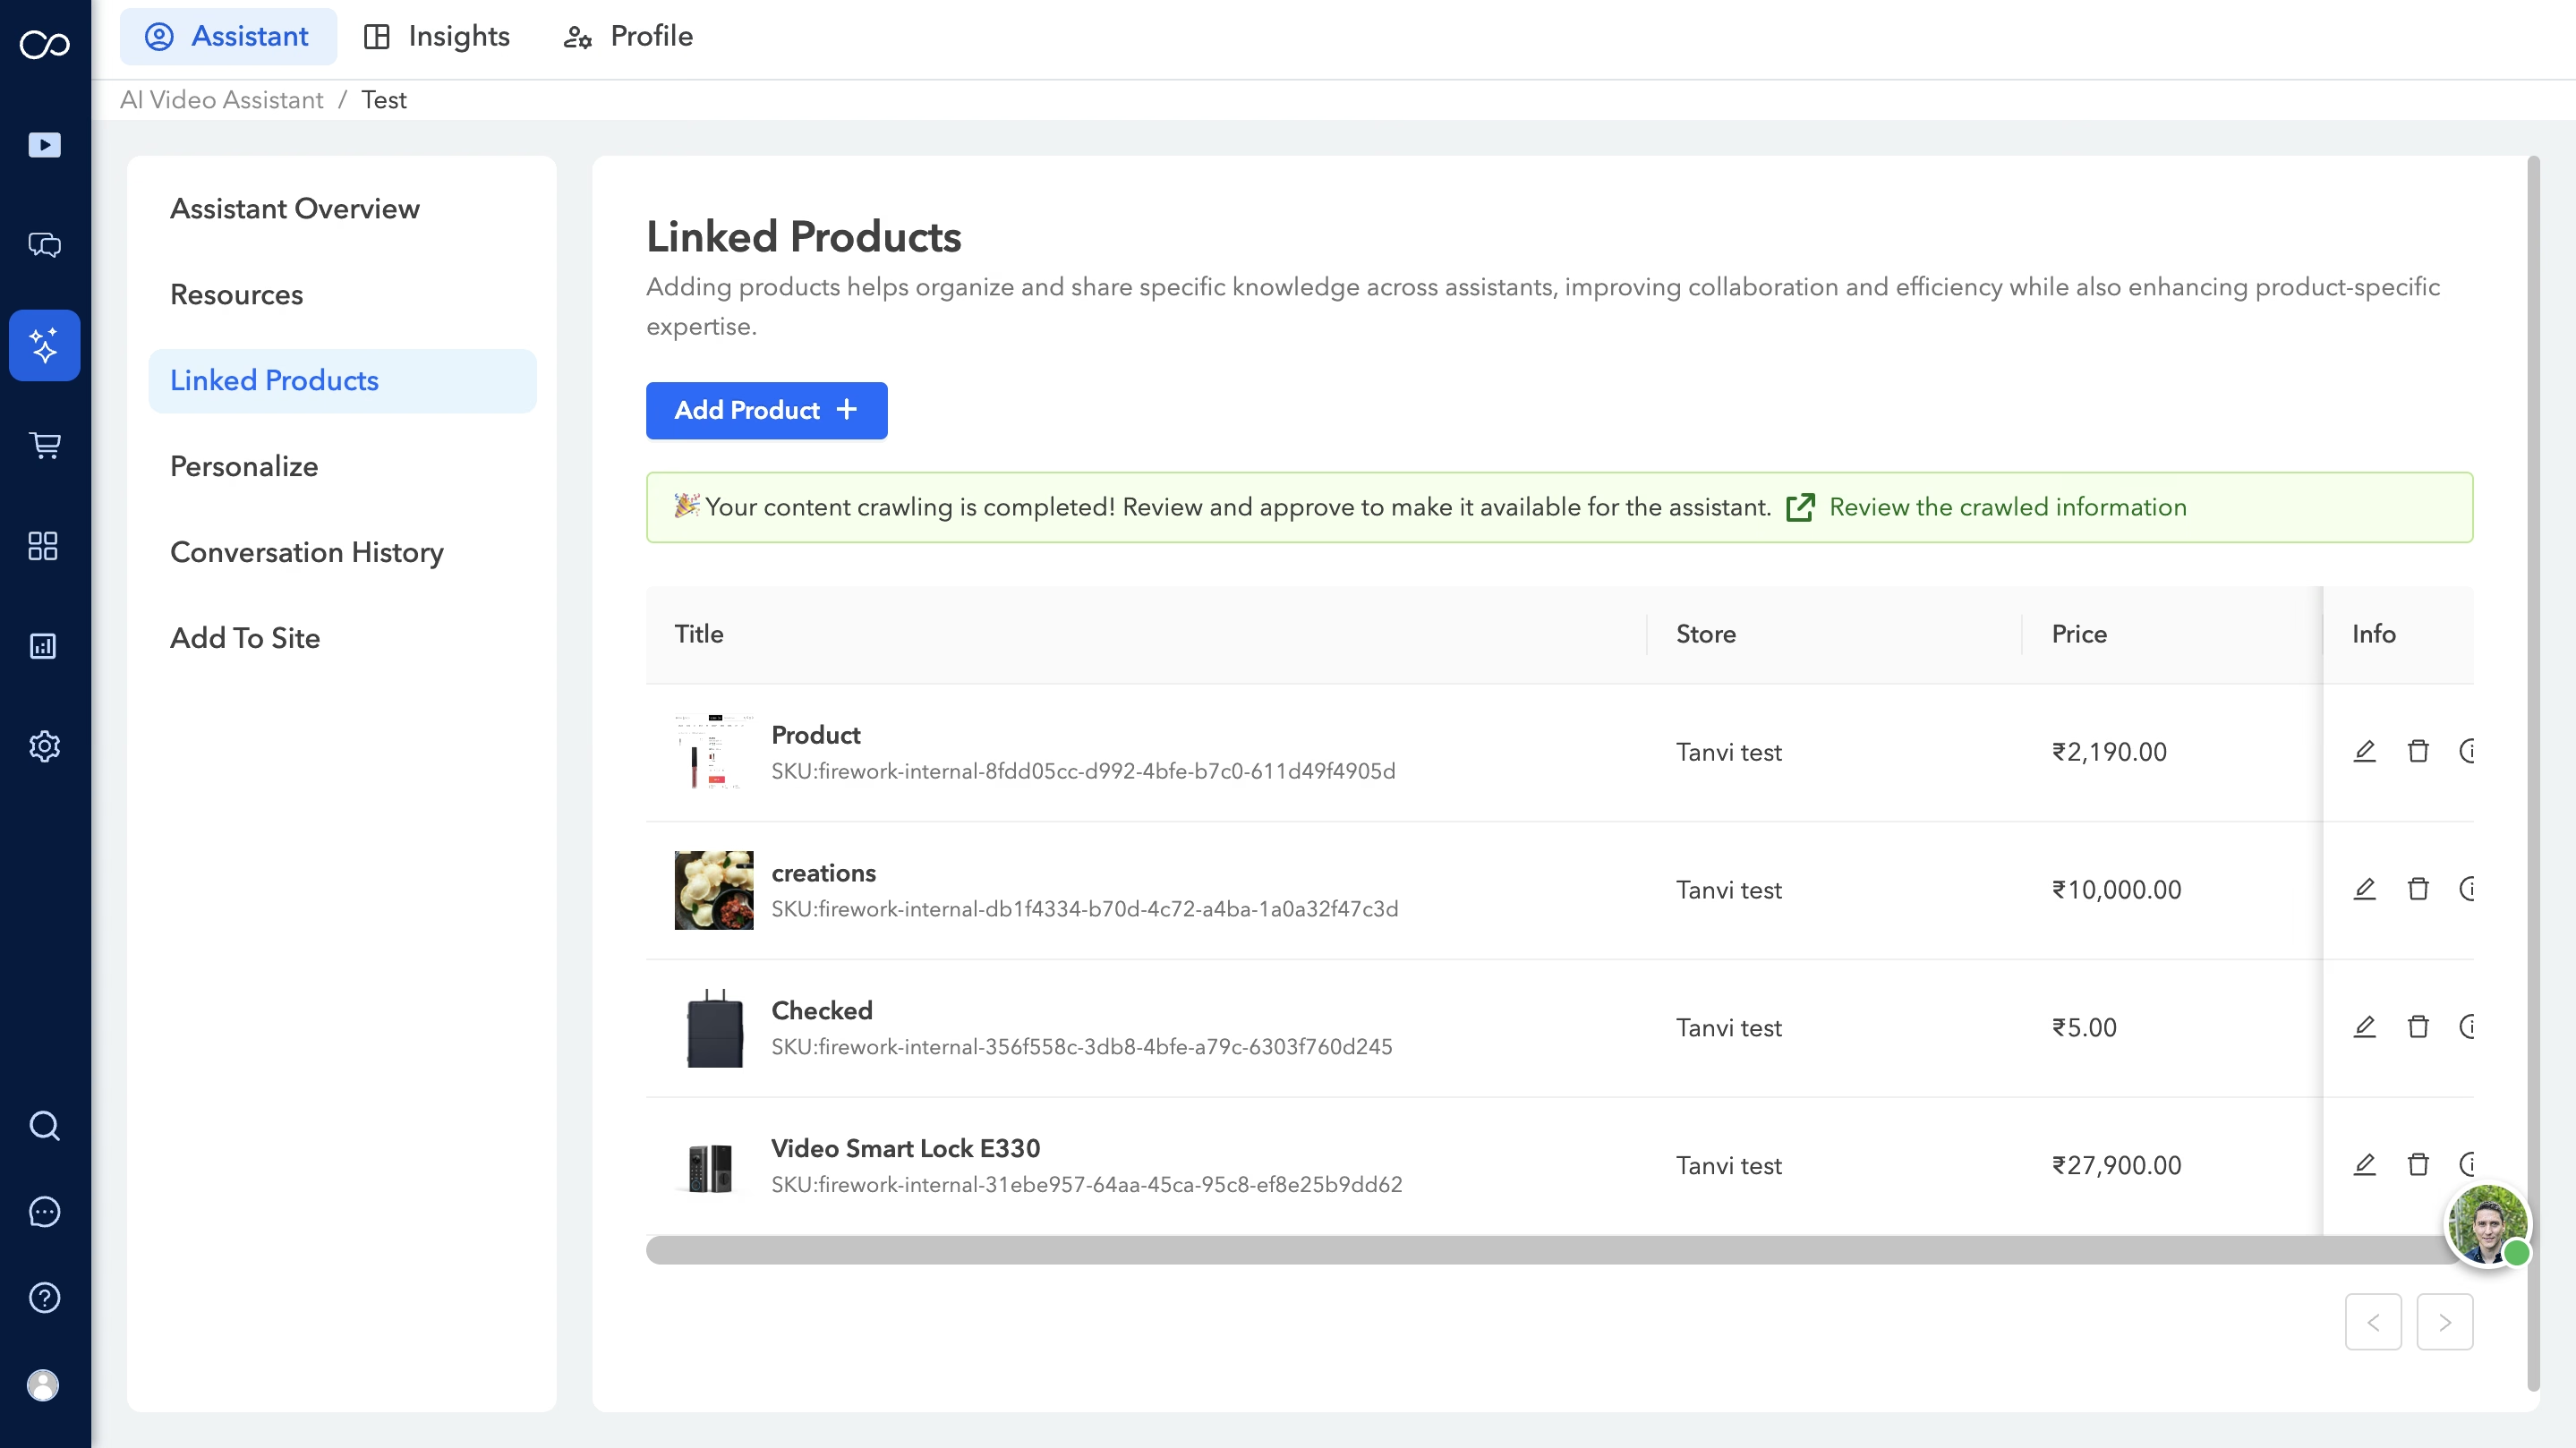
AVAに商品を追加するには、左側サイドバーの「リンク済み商品」セクションに移動し、「商品を追加+」ボタンをクリックします。
ワンクリッククローリング
ユーザーがAVAに商品をインポートすると、AVAが自動で商品詳細ページ(PDP、利用可能な場合)をクローリングし、FAQや商品比較情報を取得します。
①商品をインポート — 「リンク済み商品」>「商品を追加(+)」をクリックしてAVAにインポートします。
②自動クローリング — AVAが商品詳細ページ(利用可能な場合)を自動でクローリングし、FAQや商品比較情報を取得します。
③内容の確認 — 完了を知らせるメッセージが表示されます。「クローリングされた情報を確認」をクリックすると、リソースの編集・削除・選択ができます。
④リソースを追加 — リソースを選択し、「リソースを追加」をクリックして選択を確定します。
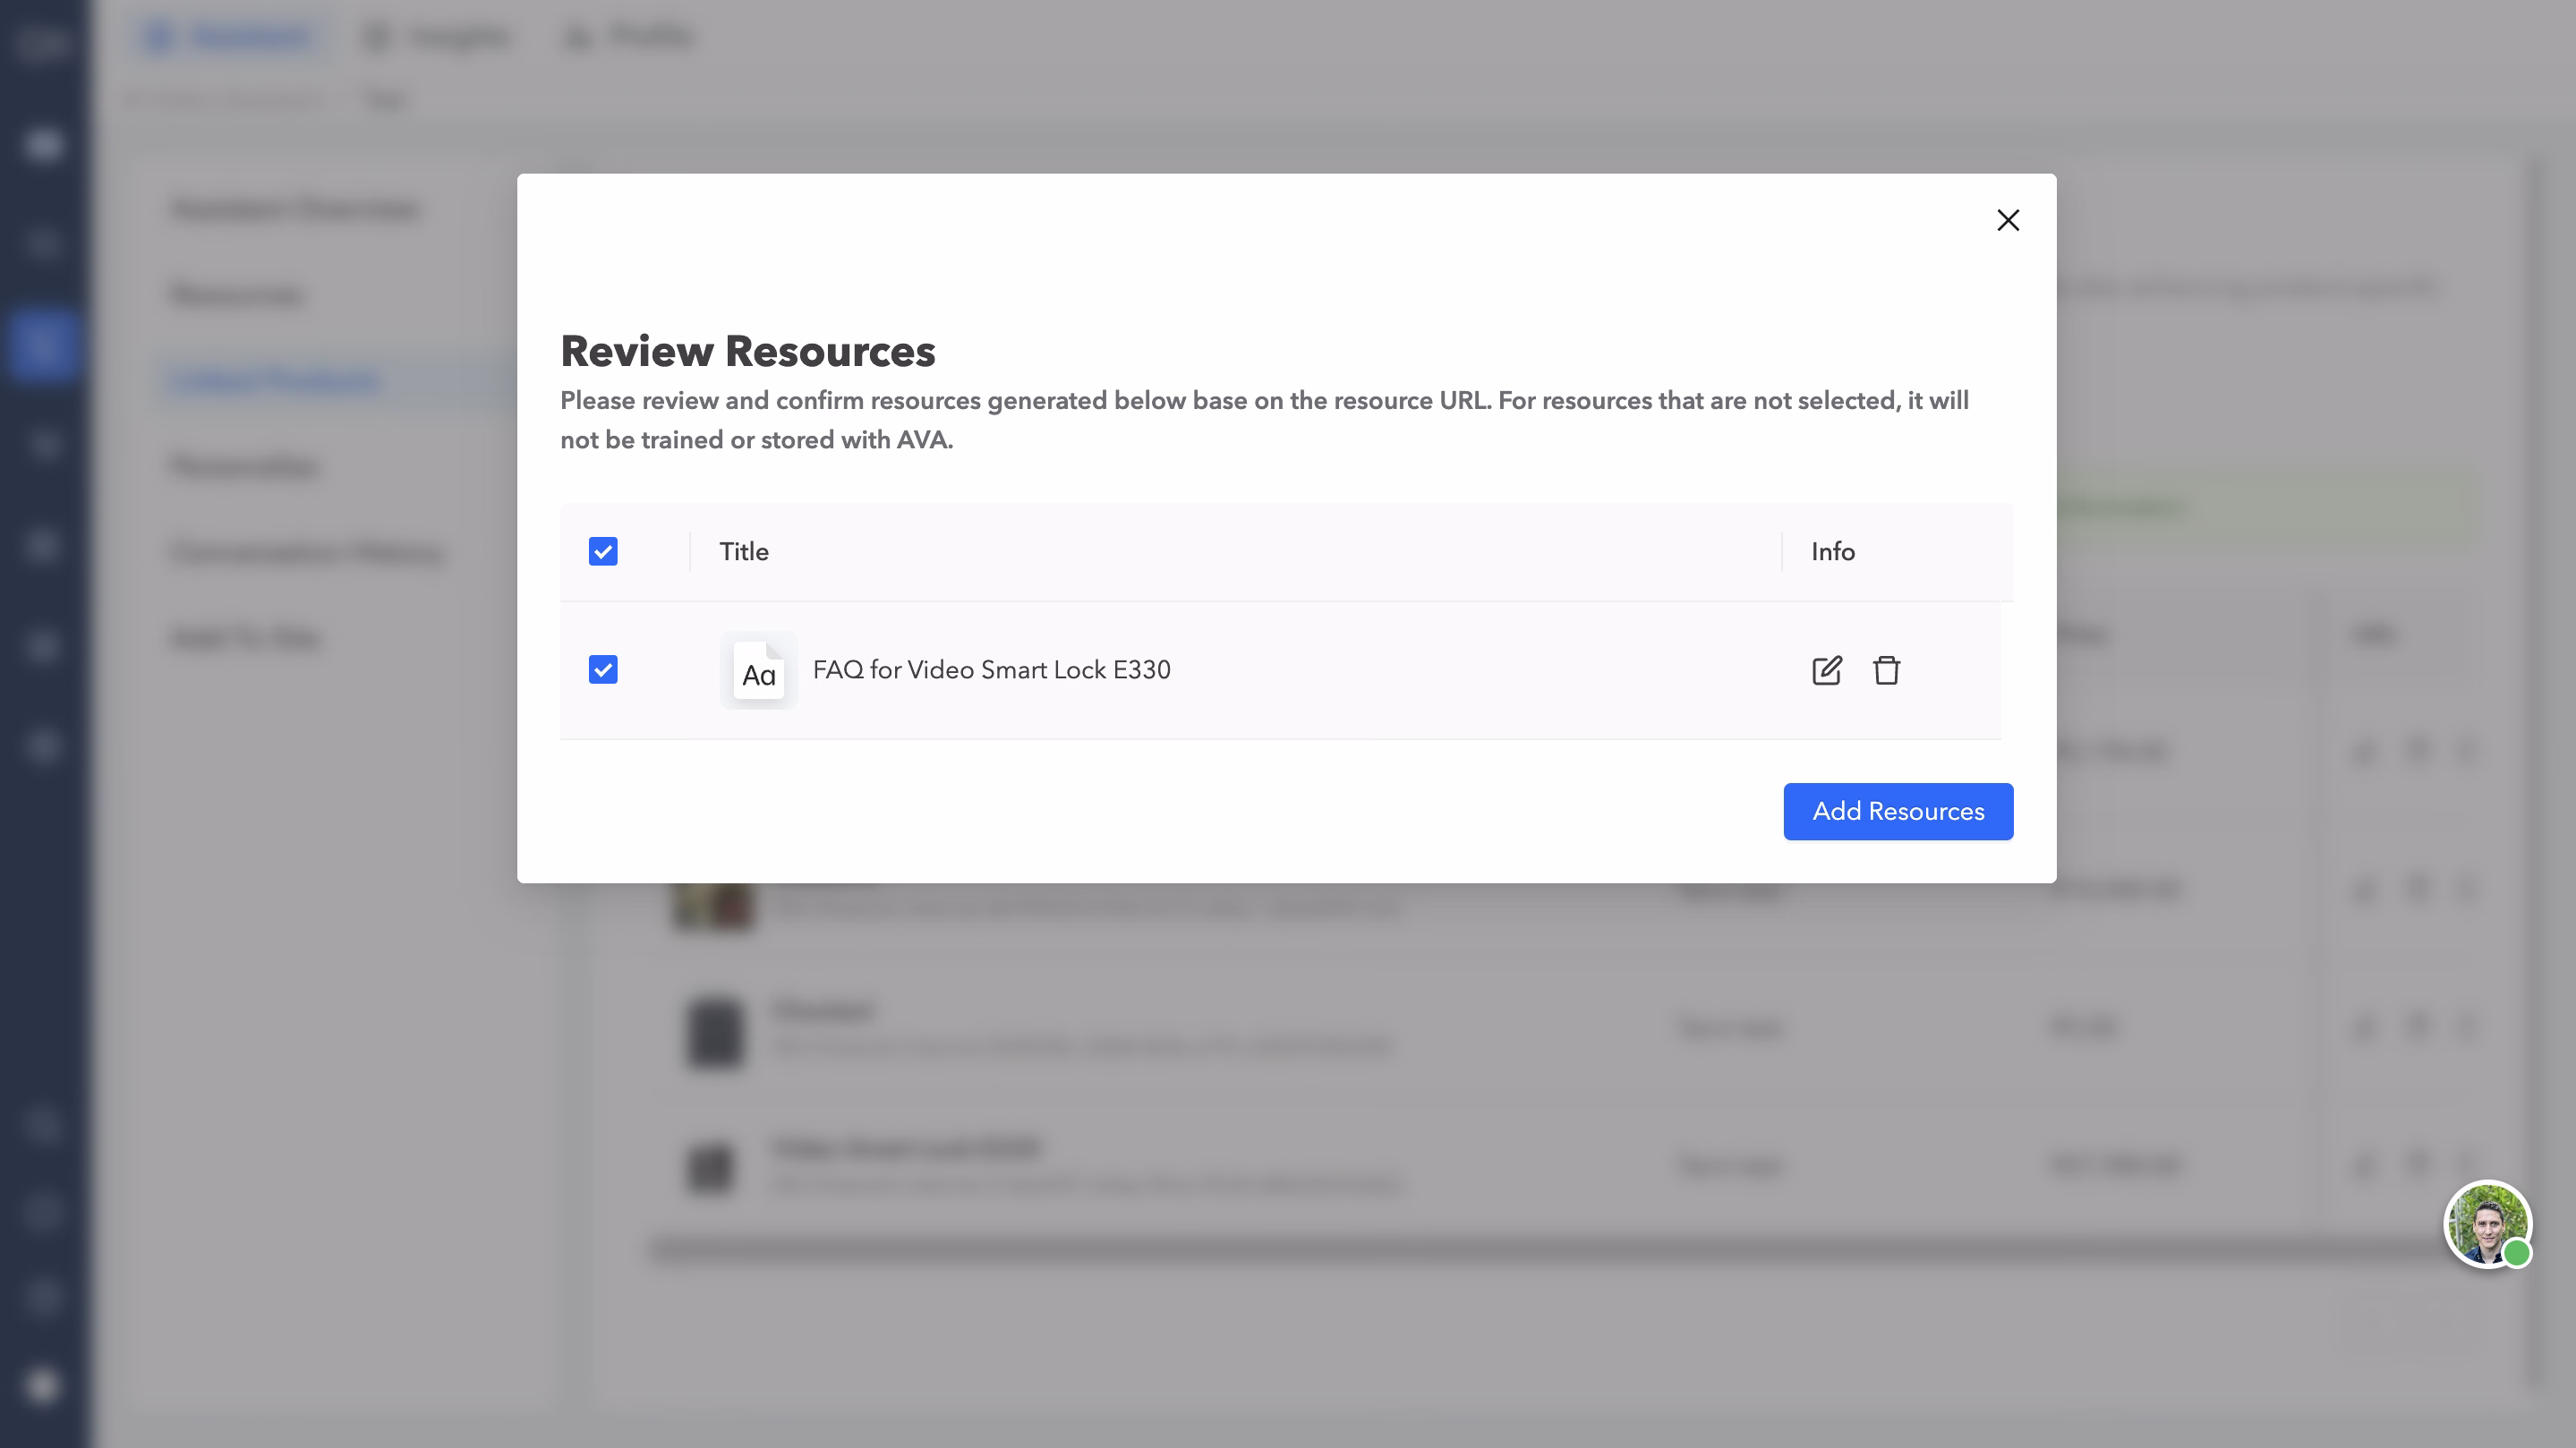
⑤選択内容の確定 — 選択したリソースのみが保存され、AVAの学習に使用されます。追加したリソースは「リソース」セクションで確認できます。
パーソナライズ
この機能を使うと、アシスタントの見た目や性格をカスタマイズし、よりパーソナライズされた体験を提供できます。アシスタントの名前、説明、挨拶、背景色、デフォルトの入力方法(会話中のテキスト入力と音声入力の切り替え)を変更できます。

会話履歴
すべての会話履歴にアクセスして確認し、ユーザーインタラクションの質を高めるためのインサイトを得られます。会話をエクスポートするオプションもあります。詳しくは会話履歴に関するガイドをご覧ください。
サイトに追加する
このセクションから、AVAをWebサイトに統合してユーザーエンゲージメントとカスタマーサポートを強化できます。AVAをWebサイトに埋め込む方法はこちらをご覧ください。
「アシスタント概要」の右側にある「プレビュー」オプションからAVAをプレビューできます。「公開」ボタンをクリックすると、AVAが公開され、ユーザーが利用できるようになります。
