Scheduling with Calendly (OTO)
Learn how to schedule and manage meetings effortlessly with Calendly (OTO), making it easy for visitors to book and attend.

1. Copying the Calendly Link
Start by going to your Calendly account and copying the event link for the meeting you want to use. This link will be used to connect your scheduling system with the One-to-One setup.

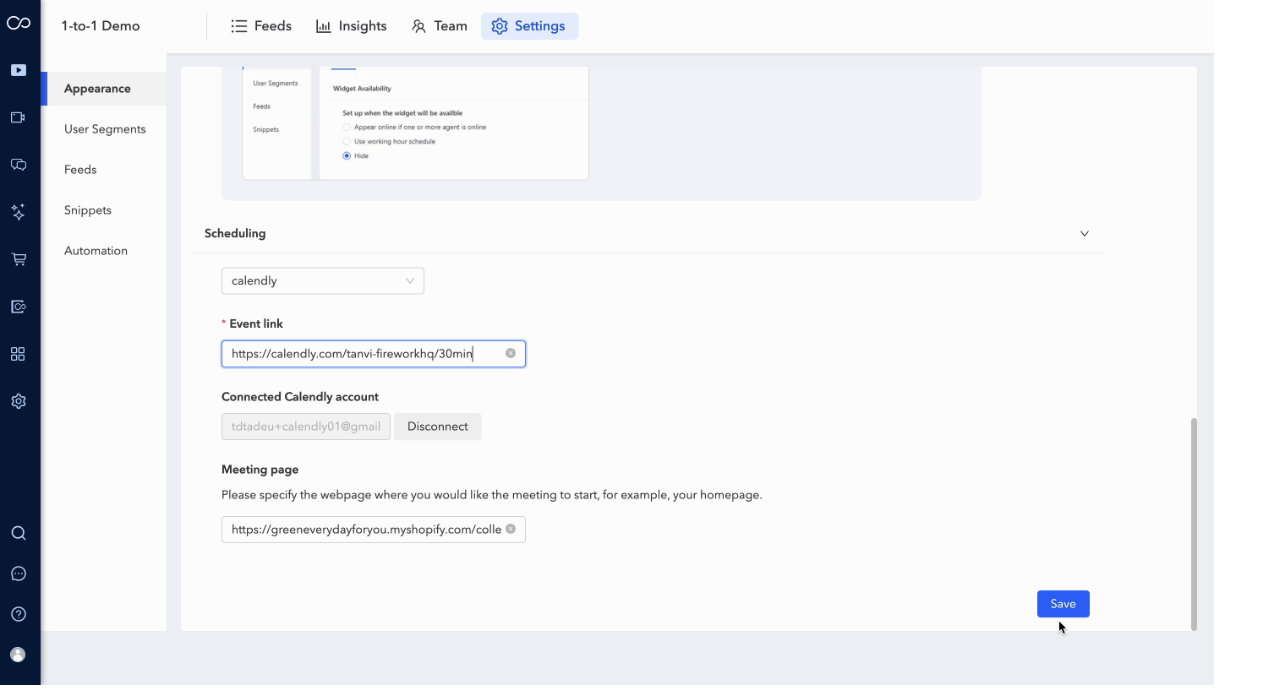
2. Embedding Calendly in One-to-One Settings
Navigate to the One-to-One Settings in your dashboard. Under the Embed option, go to the scheduling section and select Calendly as your scheduling provider.
3. Saving and Configuring the Event Link
Paste the copied Calendly link into the Event Link field. Once added, click Save to confirm your configuration. This completes the integration setup.
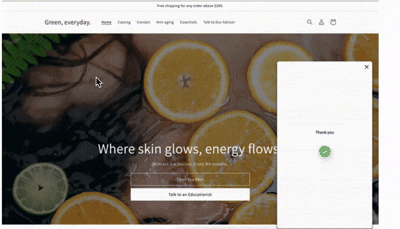
4. Customer Scheduling Experience
Once enabled, customers will be able to select their preferred date and time directly through the scheduling interface. They can also enter their name and email address while booking the call, ensuring all necessary details are captured in advance.
5. Email Notifications and Joining the Call
After booking, visitors will receive an email notification with details of their upcoming One-to-One call. The email includes a Join Call link, which redirects them back to the website.
Before joining, users can complete a quick camera and microphone check to ensure their audio and video settings are working correctly for a smooth experience.
6. Rescheduling a One-to-One Call
If customers need to change their appointment, they can easily reschedule the call using the Reschedule option provided in the same email notification.