How To: Getting Started With Firework Integration for Salesforce Commerce Cloud

Firework integration for Salesforce Commerce Cloud is quick and easy thanks to the Firework SFCC Cartridge.The integration process for this cartridge involves the deployment of a generic cartridge, combined with minor modification of templates inside the storefront code, for the cartridge to be fully functional. This eliminates any dependency on 3rd-party products and solutions.The following steps will walk you, step-by-step, through the process of setting up the Firework SFCC Cartridge within your Salesforce Commerce Cloud backend.A detailed cartridge installation guide can be found here.Step 1: Download the Cartridge Package from Git Repository.Step 2: Configure Cartridge Paths to ensure that the Firework Cartridges are loaded.
- Go to Administration > Sites > Manage Sites > YourSite > Settings and add the Cartridges that include: int_firework_pd:
- In Administration > Sites > Manage Sites > Business Manager > Settings, add the Cartridges that include: bm_firework_pd:bm_firework_dashboard:
Step 3: Install the following 3 cartridges in the SFCC cartridges directory
- bm_firework_dashboard
- bm_firework_pd
- Int_firework_pd
All 3 cartridges can be found in the ZIP file.Step 4: Upload the following files from the metadata folder:
- firework-sys-custom-obj-defs.xml
- Navigate and upload the file to Administration > Site Development > Import & Export > Import & Export Files > Upload > Choose File Upload

- Import the metadata by navigating to Administration > Site Development > Import & Export > Metadata > Import > Select the uploaded file > Click Next
- To upload services and jobs, upload the following files from the metadata folder:
- firework-job.xml
- firework-sfcc-services.xml
- To upload the file, navigate to Administration > Operations > Import & Export Files
- Import the Services file by navigating to Administration > Operation > Services > Import > Select the uploaded file (firework-sfcc-services.xml) > Click Next > Import
- Import the Jobs file by navigating to Administration > Operation > Jobs > Import > Select the uploaded file (firework-job.xml) > Click Next > Import
Step 5: To enable the Firework cartridge…
- Navigate to Administration > Organization Roles & Permissions > Administrator > Business Manager Modules
- Select the site or organization for which you want to enable the Firework Cartridge
Step 6: Configure the API
- Setup API client on demandware Account Manager by logging in to Demandware Account Manager and navigating to API Client > Add API Client > Setup Display Name, Password, and Select Your Organization > Roles > Select your Production / Sandbox Instance for Commerce Cloud Developer Experience and Salesforce Commerce API
- Default Scopes
- roles
- tenantFilter
- profile
- tenant
- Filter
- openId
- Allowed Scopes
- sfcc.shopper-customers.register
- sfcc.shopper-customers.login
- sfcc.products.rw
- Sfcc.catalogs.rw
- Redirect URLs
- https://localhost:8080
- https://admin.us02.dx.commercecloud.salesforce.com/oauth2-redirect.html
- https://your_admin_URL/on/demandware.store/Sites-Site/default/oauth-callback
- To get the Your_admin_RedirectURL, navigate to Select Site, Merchant Tools > Manage Firework > Firework Dashboard
- Token Endpoint Auth Method: private_key_jwt
- Access Token Format: JWT
- Once you click Save, it will generate the API Client ID. You will need to remember the password set during Client Registration; it will be needed for the next steps
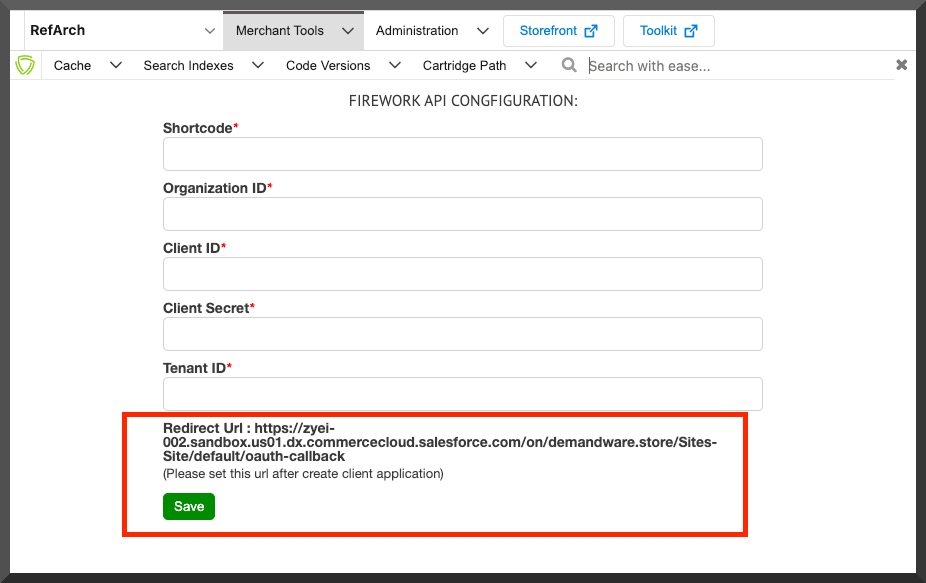
Step 7: To setup Site preference, select Store and navigate to Merchant Tools > Site Preferences > Custom Site Preference Groups > fireworkDashboardConfigNameValueFirework API EndPoint URLhttps://fireworktv.comFirework Iframe URLhttps://business.firework.comCurrencyYour Store CurrencySite TitleYour Store TitleProviderSALESFORCEGraphql Endpoint URLhttps://fireworktv.com/graphiqlBusiness Unique IdYour Store Storefront URLClient NameSalesforce Commerce CloudContact EmailYour Store Contact EmailStep 8: To configure the Firework API, navigate to Select Site Merchant Tools > Manage Firework > Firework Dashboard
- The ClientID and Password obtained from Step 6 will be entered here
- To find a Shortcode and Organization ID, navigate to Administration > Site Development > Salesforce Commerce API Settings
- For the Tenant ID, look at the first part of the Redirect URL, before .sandbox
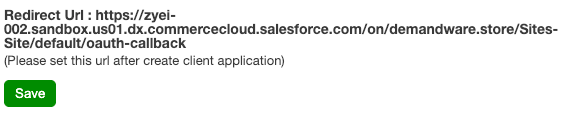
- In the example above, zyei-002 is the ID, so the Tenant ID becomes zyei_002
Step 9: Load the Firework Dashboard by navigating to Merchant Tools > Manage Firework > Firework Dashboard
- On the Salesforce Product Feed / Import page, click Import to get a list of all products from your Salesforce store
- Select the products you’d like to import directly from your Salesforce store to the Firework business store
Step 10: To add the Firework Widget to the Storefront, navigate to Merchant Tools > Content > Page Designer
- Select the Page to which you want to add the widget
- Select the Layout from Firework Components
- Select the Channel List and Playlist from the widget settings
- After clicking on Save & Close, the widget will be added to the page
Note: The Firework widgets are asynchronous that will gracefully degrade and not block any page elements from loading.A video tutorial for the steps above can be found here. Additional, in-depth Firework integration for Salesforce Commerce Cloud instructions are available in the developer docs.Integration steps for getting started with WordPress, Magento, and Shopify are also available for developers.
Unlock Exclusive Insights
By submitting this form, you agree to Firework's privacy policy and consent to receive personalized marketing communications. You can unsubscribe at any time.